How to collect user data like e-mail addresses and name with Loomsuite on Instagram
How to collect e-mail addresses with Loomsuite on Instagram
This blog will show you how to collect users’ email addresses right in your DM. Please follow the instructional blog step by step.
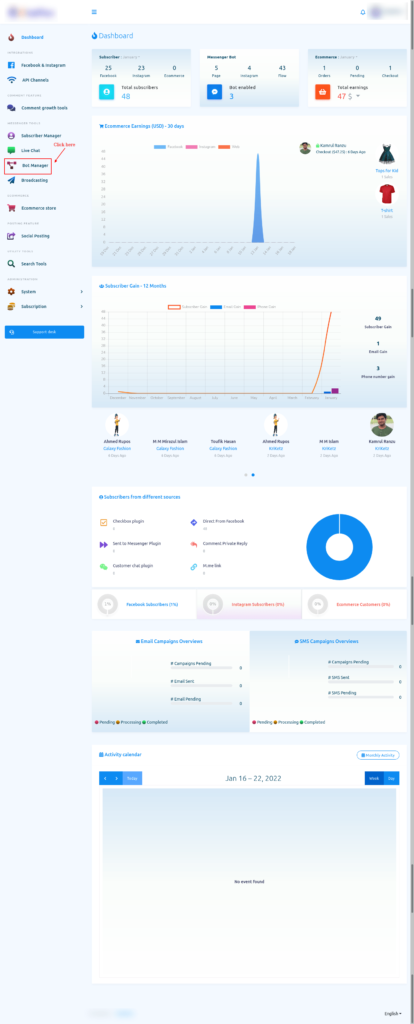
To collect the emails, first, go to the dashboard of the Loomsuite. Now click on the Bot manager option at the left sidebar of the dashboard.
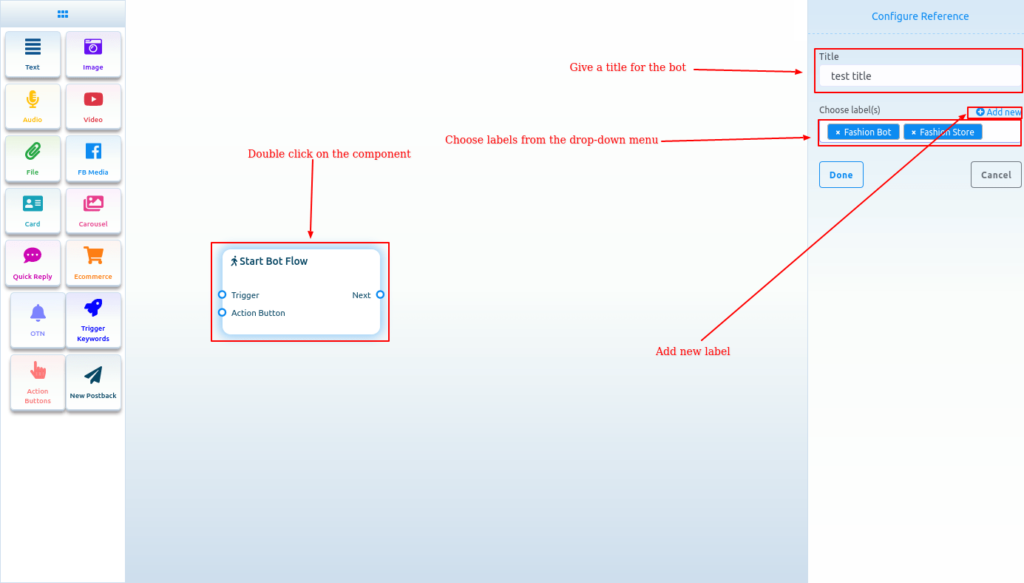
Start bot flow
On the Editor, you will see an element called start bot flow. This component is essential to building the bot. Double-click on the Start bot Flow element and the Right Sidebar called Configure Reference will appear with two fields – Title and Choose Labels. In the title field, give a title for the bot.
And in the Choose labels field, you have to select labels from a drop-down menu of different fields. You can select multiple labels in the Choose labels field. Now click on the Done button and the information will be added to the element.
You can also add a new label
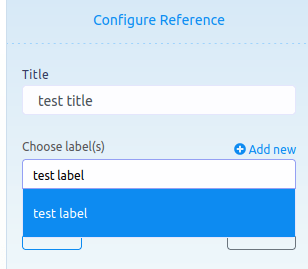
Add new label
And from the Choose labels field, you can add a new label. Just write down the name of the label and press enter.
Trigger the Bot keywords or Conversation Starter
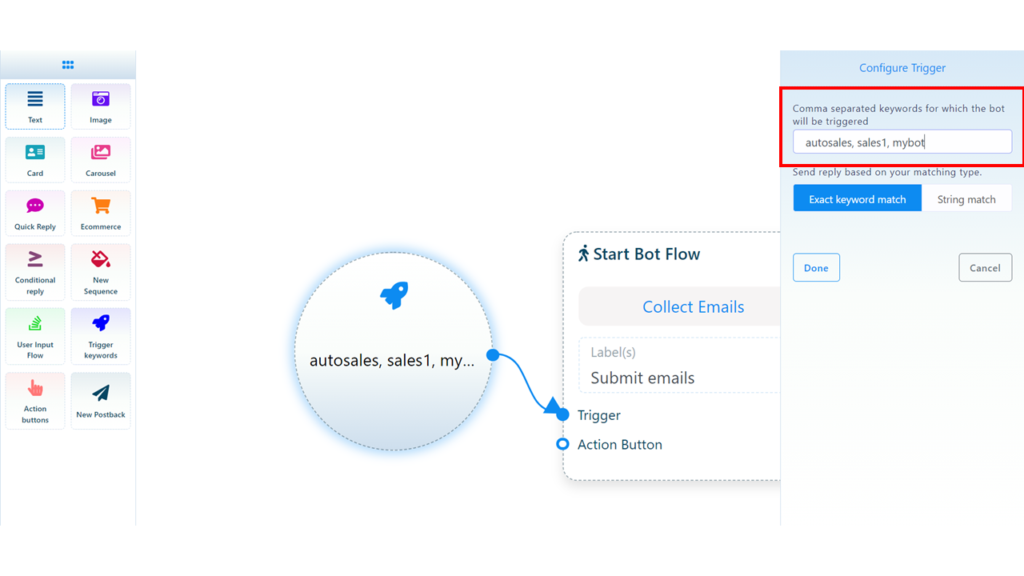
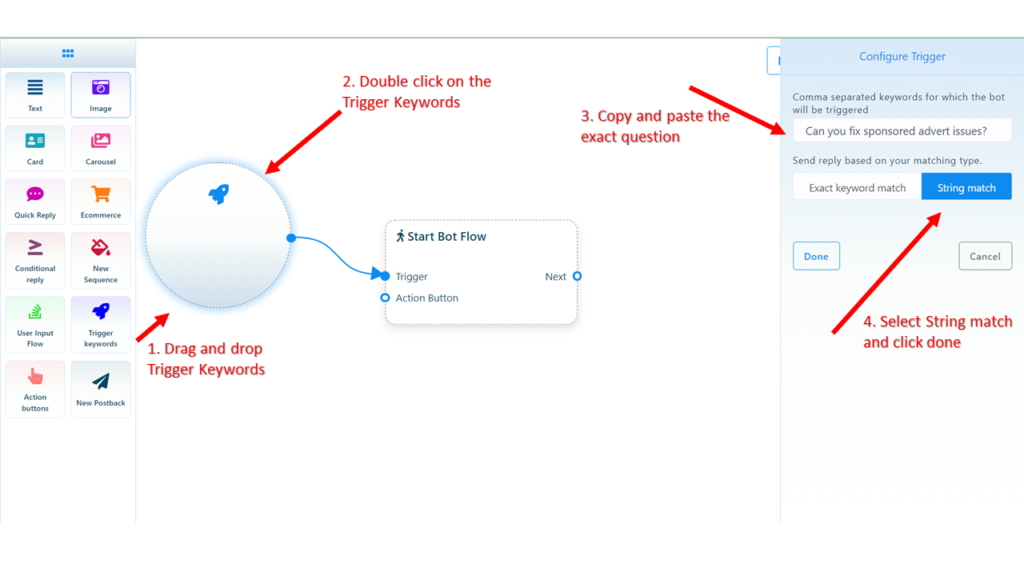
Now drag the trigger keywords element and drop it on the editor. Now double-click on the component and a sidebar called configure Trigger will appear. In the field, you have to provide your keyword(s). They should be comma-separated if more than one keyword. When a user writes one of the keywords, the bot will start. Select a matching type – *Exact keyword match* for one word trigger keywords like autosales and *String match* for long sentence like Can you fix sponsored advert issues.( Conversation stater).
Then click on the Done button. And the keywords will appear on the component.
Now connect the Trigger Keywords component with the Start Bot Flow component.
For one-word keywords
For conversation starter
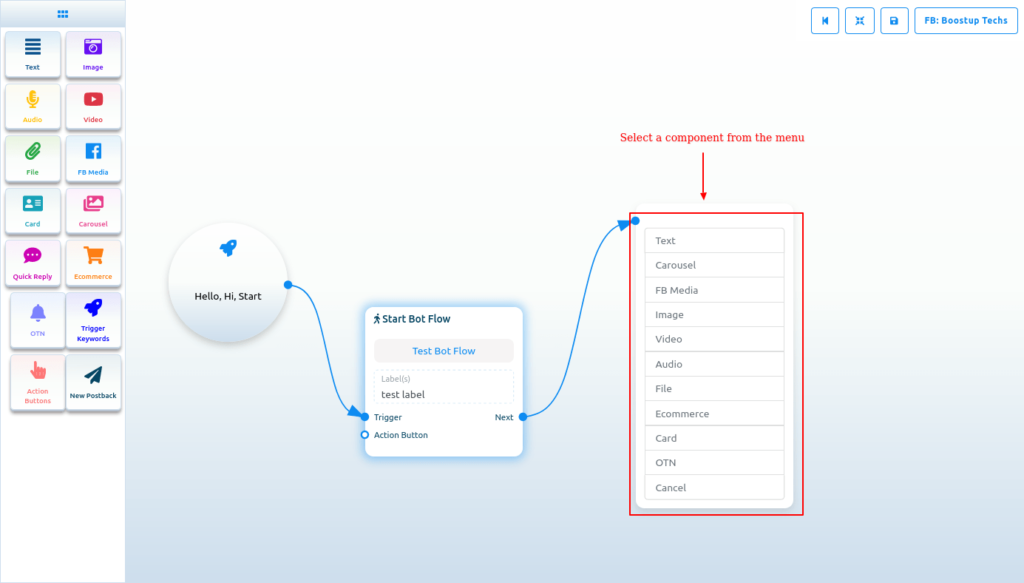
Add components without dragging from Doc-menu
You can also add components without dragging the component from the Doc-menu and dropping it on the editor. From the next output of any component, drag the cursor and drop. And instantly a menu of the different components will appear. And from the menu, select a component and the component will appear on the editor connected with the mother component.
If you drag your cursor from the button output of any component and drop it on the editor, then the button component will appear on the editor connected with the mother component.
NB. The Button component is not present in the Doc-menu.
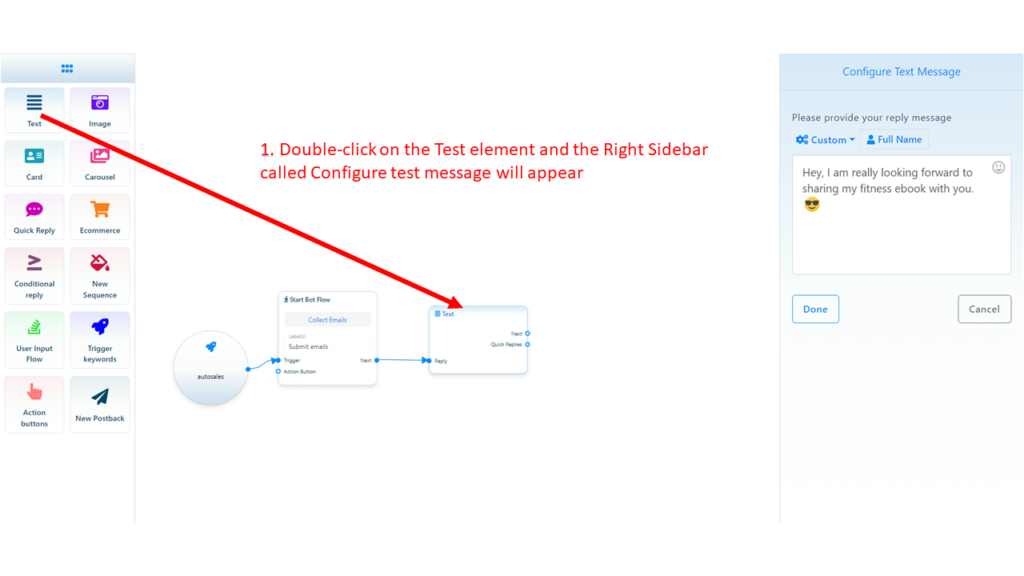
Adding Text
If you want to build a bot with a text element, drag the Text Component and drop it on the editor. Now double-click on the component and a sidebar called Configure Text Message will appear with a text field. In the text field, you have to provide your reply message. You can include the first name or the last name of the user in the reply message.
Now click on the Done button and the information will appear on the component. Then connect the text component with the Start bot flow component.
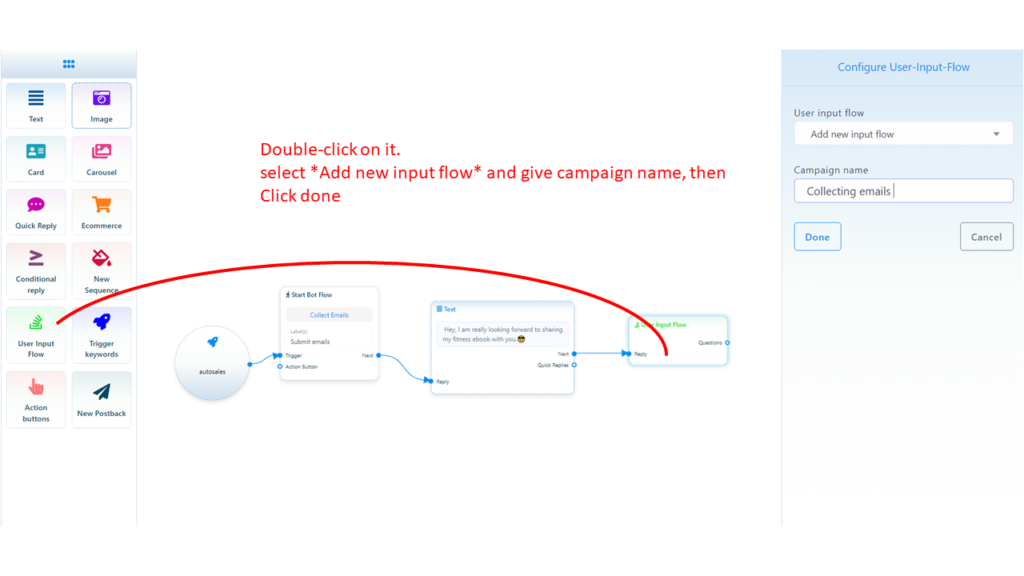
Add User input flow
This competent can be used to collect information from users. All the need to do is to type and send the information like e-mail , phone number or their address replying your flow.
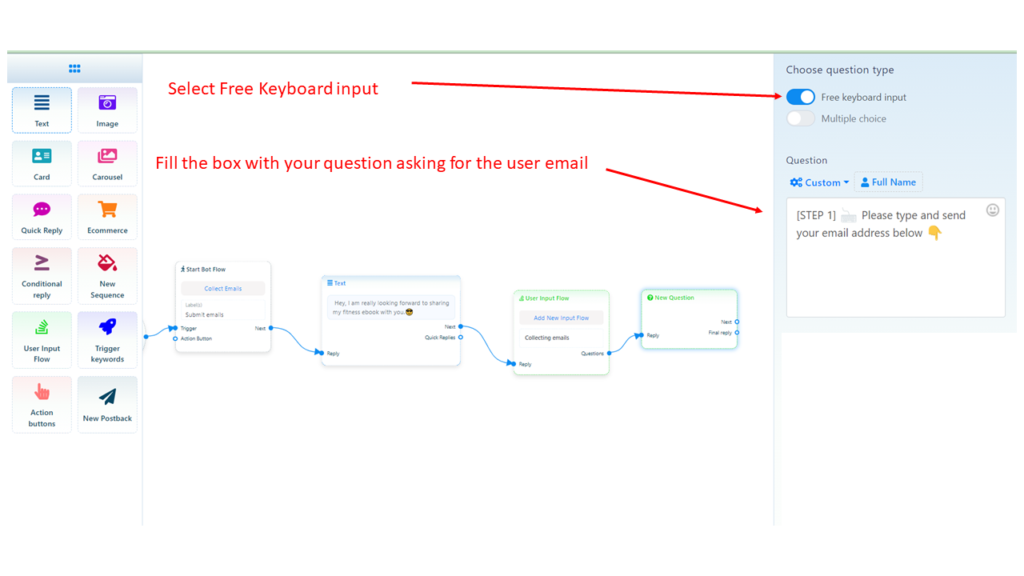
Fill up the new question
Double click on the new question competent
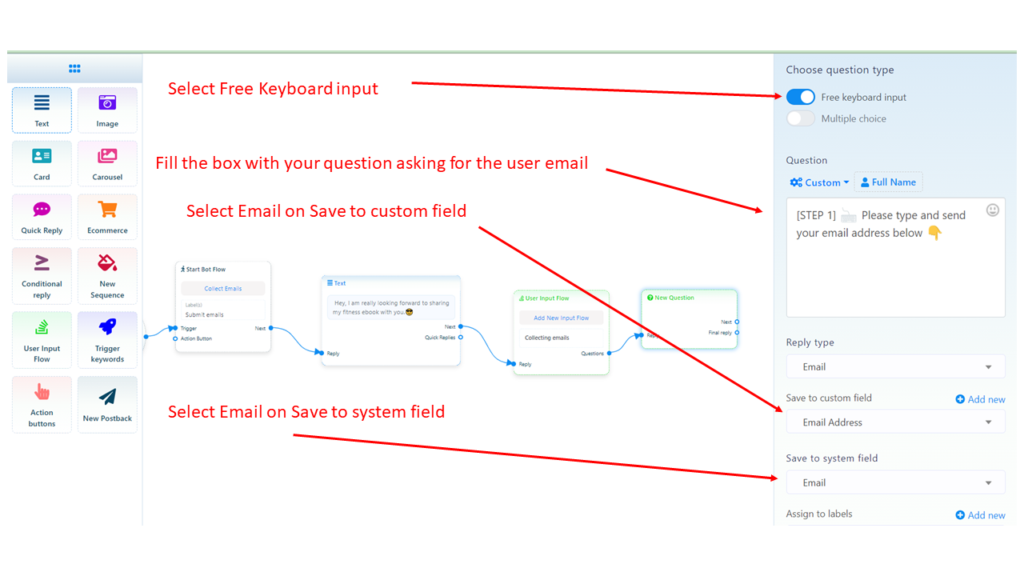
Select the Free Keyboard input and input your question in the question box below
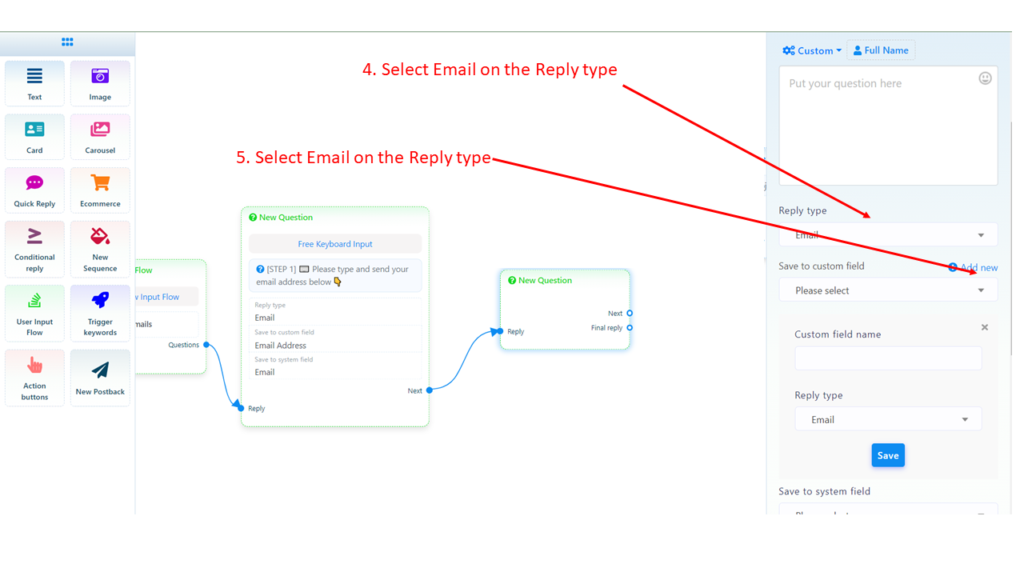
Select the *Reply type* to be email because we are asking for the user email address. This will allow the system know that we are asking for email address.
Select email from *save to custom field* and also from *save to system field*
You can also assign a label then scroll down and you click done.
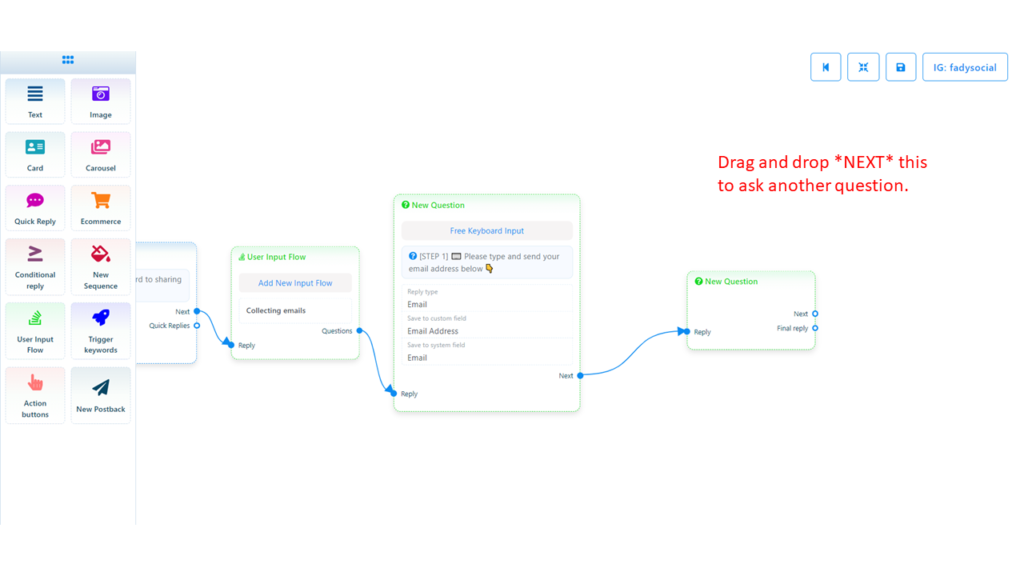
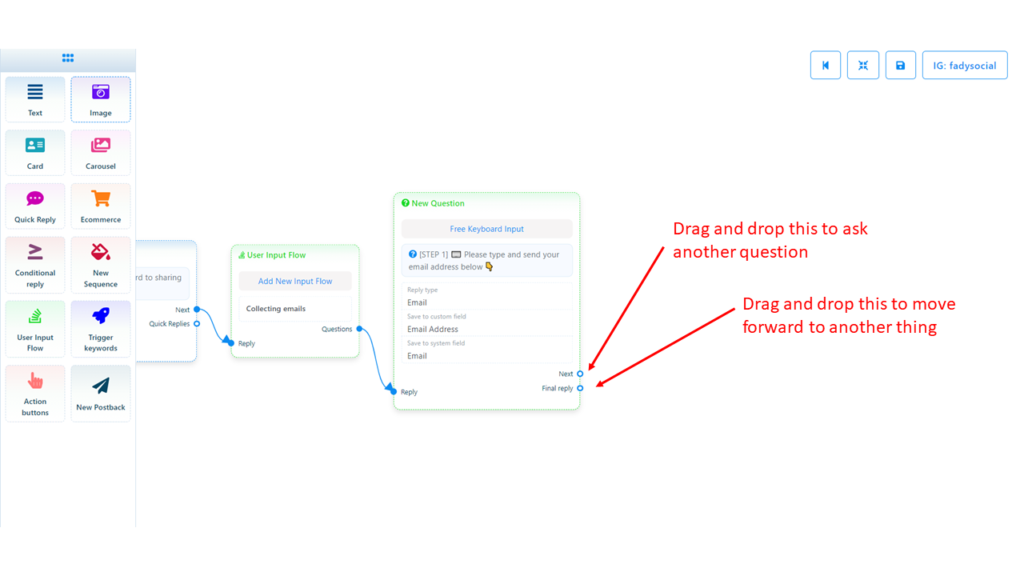
Drag and drop *NEXT* this to ask another question.
This time we are asking for the name.
Drag and drop *NEXT* this to ask another question.
This time we are asking for the name.
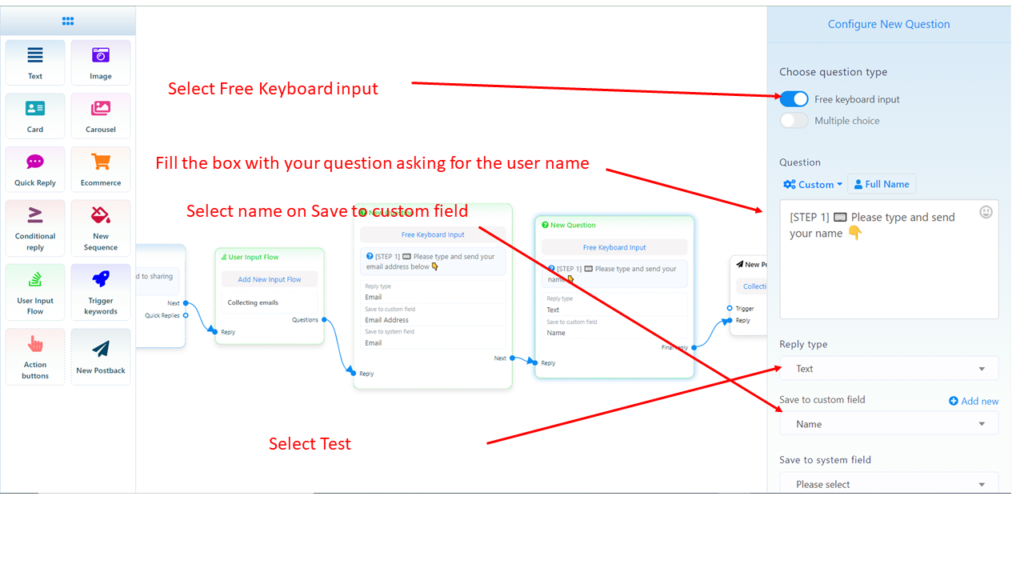
Fill up the new question. Double click on the new question competent. Select the Free Keyboard input and input your question in the question box below.
Select the *Reply type* to be name because we are asking for the user email address. This will allow the system know that we are asking for email address.
Add new *Save to custom filed*.
Input *Name* in the *Custom field name* and select *test* as test reply type, click save the select the Name in the Save to custom field.
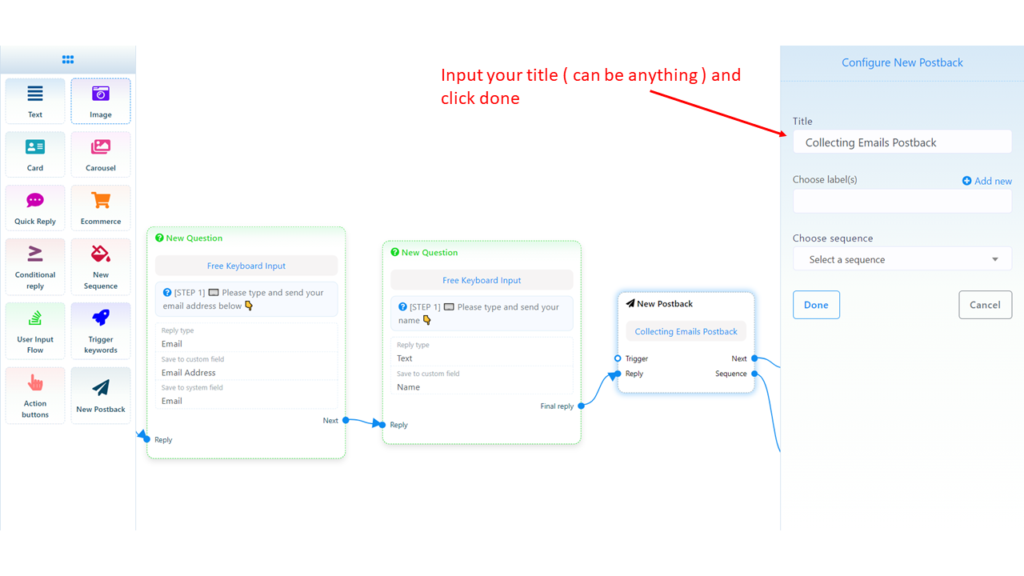
Drag and drop final reply and a new postback will show up.
Fill the title and click done as seen below.
Drag and drop the next competent and add whatever you want from the pop up. We are adding a test in the image below.
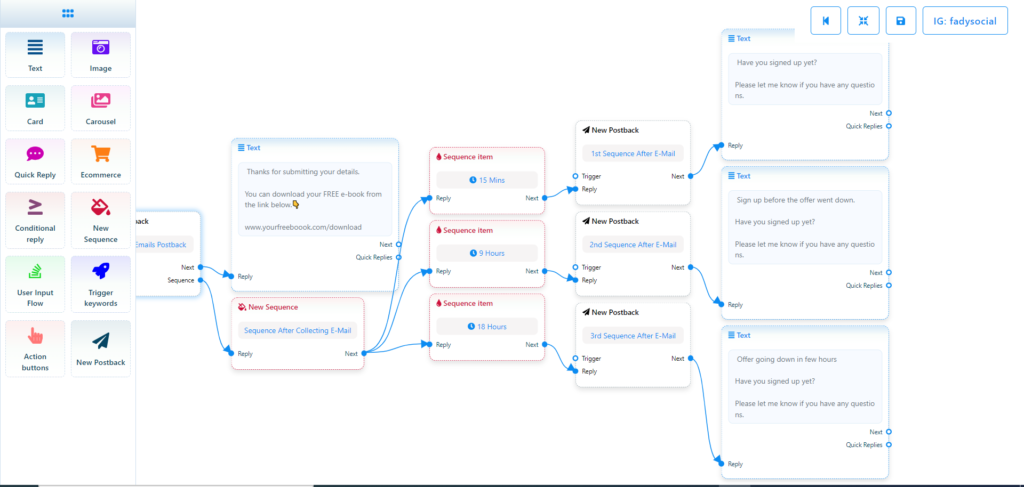
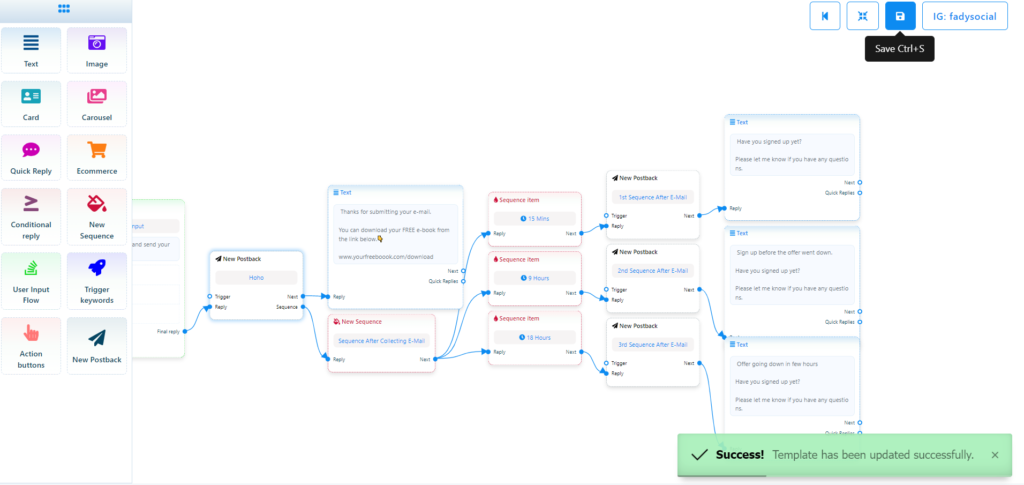
You can then add a *New sequence* DM sequence message.
Sequence are messages you are allowed to send within 24 hours of users interacting with your DM.
You can send as many sequence message as you want within the 24 hours. You are not allowed to send any sequence message outside 24 hours and this is a rule from Facebook.
You can then add a *New sequence* DM sequence message.
Sequences are messages you are allowed to send within 24 hours of users interacting with your DM.
You can send as many sequence messages as you want within 24 hours. You are not allowed to send any sequence message outside 24 hours and this is a rule from Facebook.
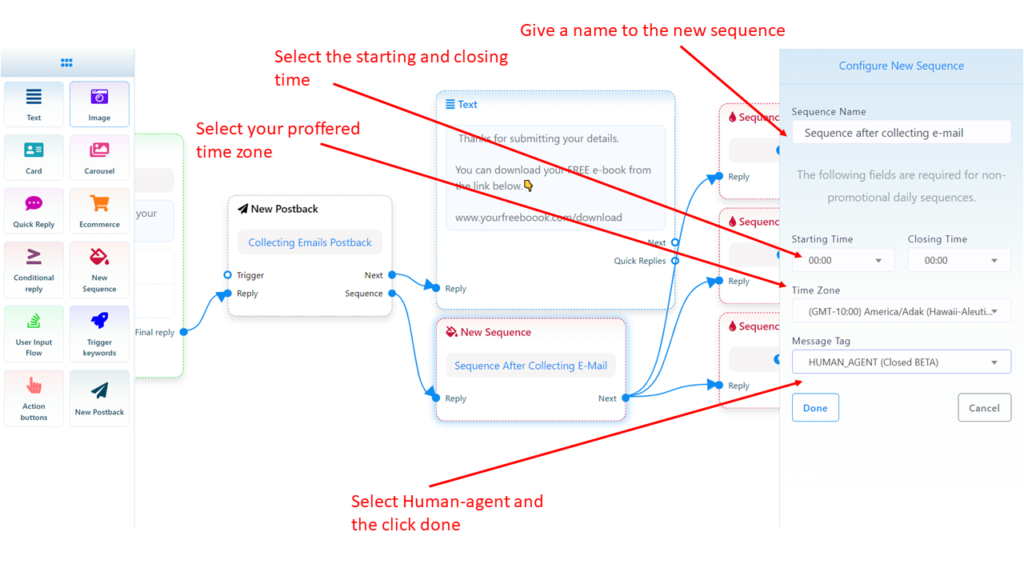
Double click the New sequence competent and fill the pop-up box as seen in the image below.
Double click the sequence item competent and fill the pop-up box as seen in the image below.
Do the for the 3 sequence items.
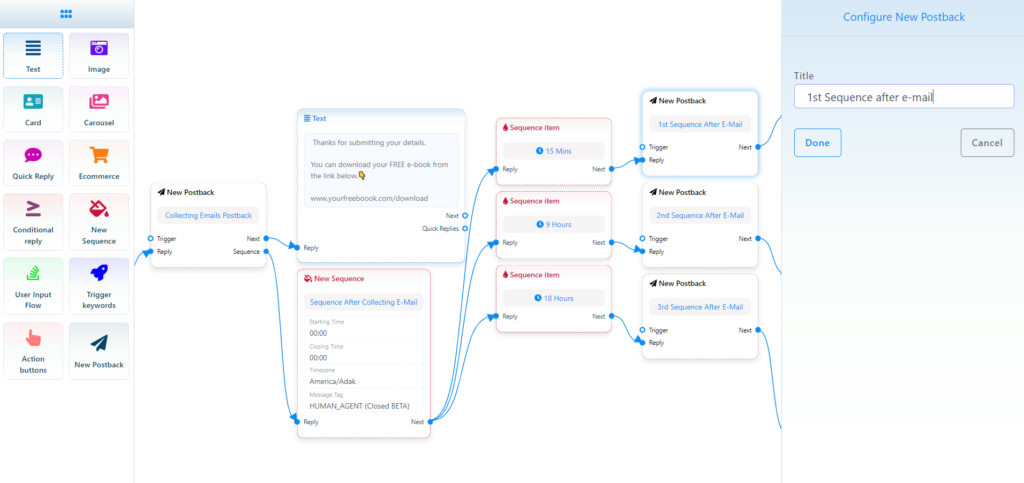
Double click the New postback, give a title and click done.
Title can be anything. Do the for the 3 new postback.
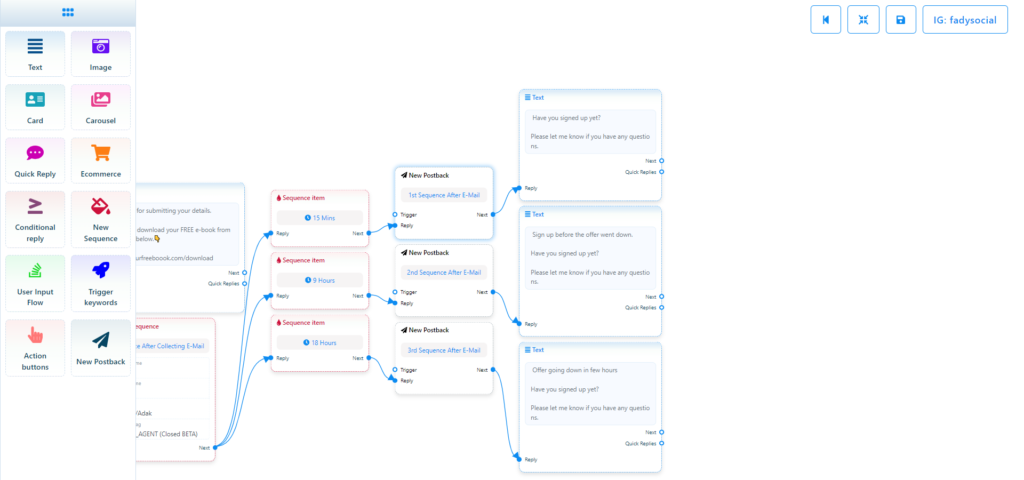
Double click on each of the test items and fill in your test.
This test mine be reminder to the user that interacted with your DM automation to take your offer.
Click on the save button after filling all the text boxers and your automation flow should be saved.