

First, you have to develop a bot that will send request to users to opt-in to receive Recurring Notification.
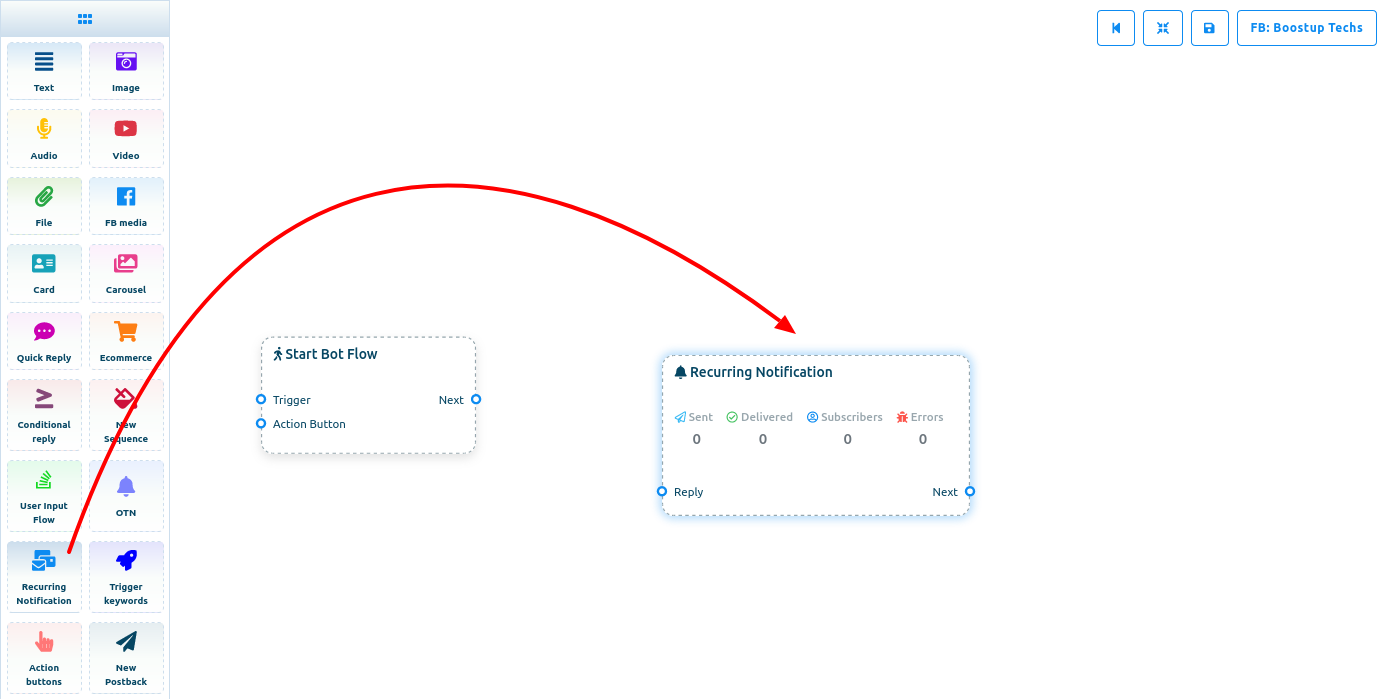
To create a the bot, first, go to the Flow Builder of Loomsuite. Then, from the doc-menu, drag the Recurring Notification component and drop on the editor.
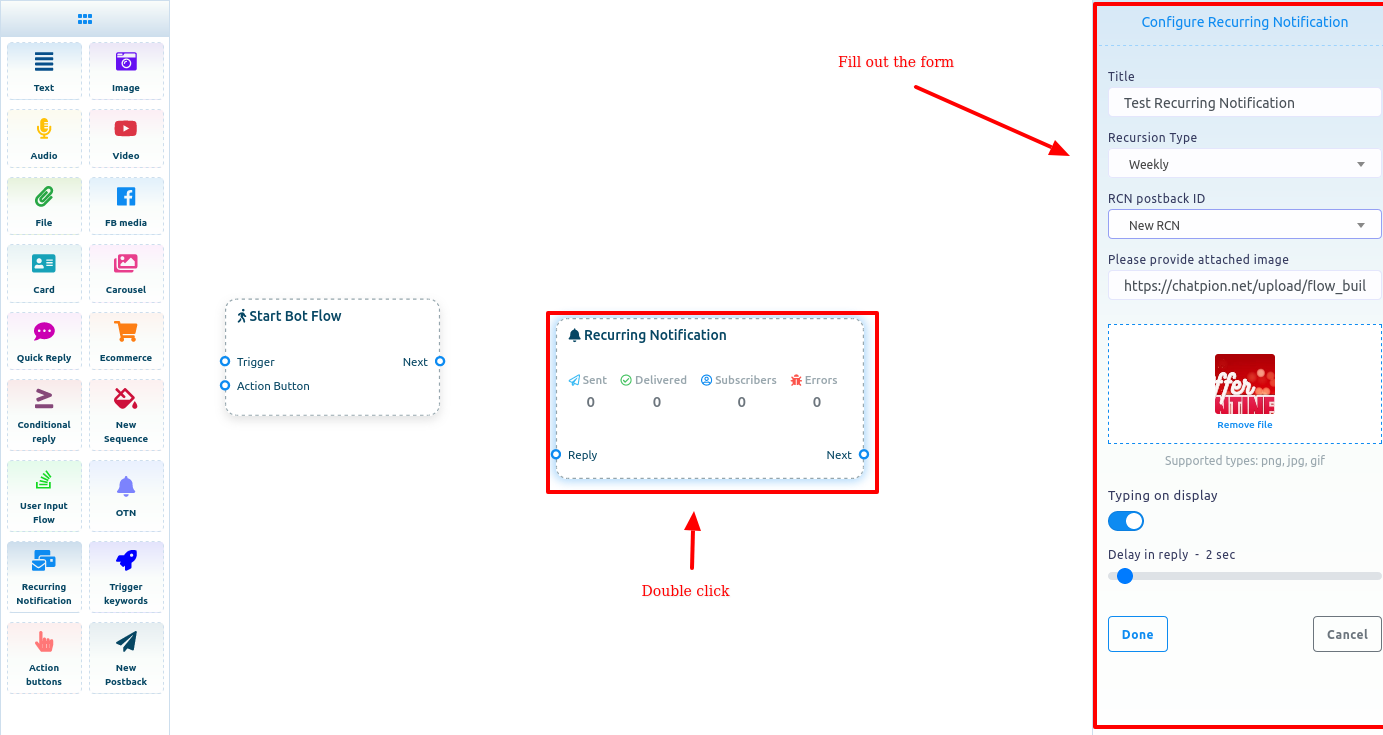
After that, click on the Recurring Notification component and instantly a modal form called Configure recurring notification will appear. Now you have to fill out the form.
Give a title for the Recurring notification in the title field. Then select a recursion type in the Recurssion type field. Click on the field and instantly a drop-down menu of differen recursion type — Daily, Weekly, Monthly — will appear. Then select a type.
Then you have to select a RCN postback ID from a list of predefined RCN postback IDs. Of course, you can create a RCN postback ID here.
Now lets see how to create a RCN postback ID. To create a RCN postback ID, click on the field and a drop-down list will appear. Now click on the New RCN item in the list and the New RCN will be selected. Now you have to provide an image. You can upload an image from your local machine or give an image url. Well, after providing an image, you can enable typing on display and select the delay in reply type in seconds.
Now click on the Done Button.
Instantly the data will be shown on the Recurring notification component and a New RCN component connected with Recurring notification component and a New postback component connected with New RCN component will arrive.
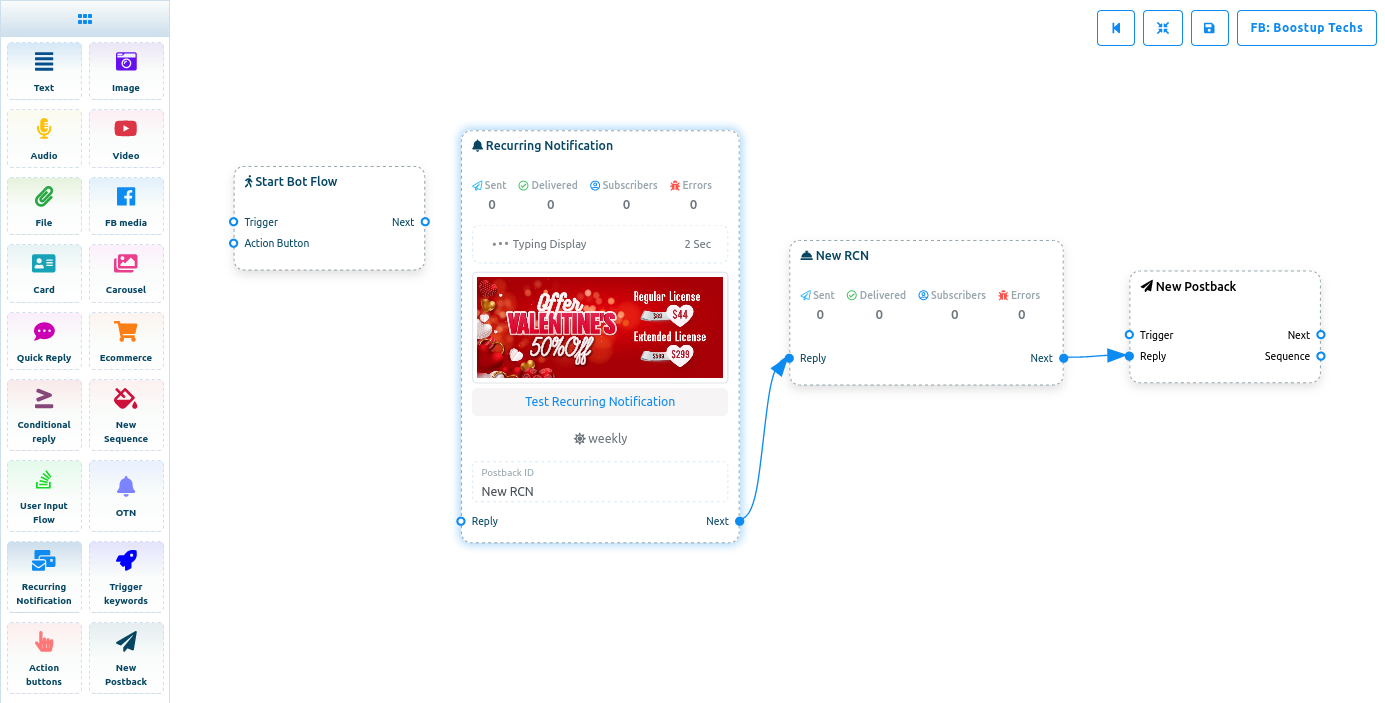
Now you have to configure the New RCN component.
Click on the New RCN component and a modal form will appear at the right side of the editor — you have to fill out the form. Give a Template name in the Template name field. You can select a Label in the Labels field — of course, you can select more than one Label. Then you can select a sequence in the choose sequence field. Like before, you can enable typing on display and select the Delay in Reply in second.
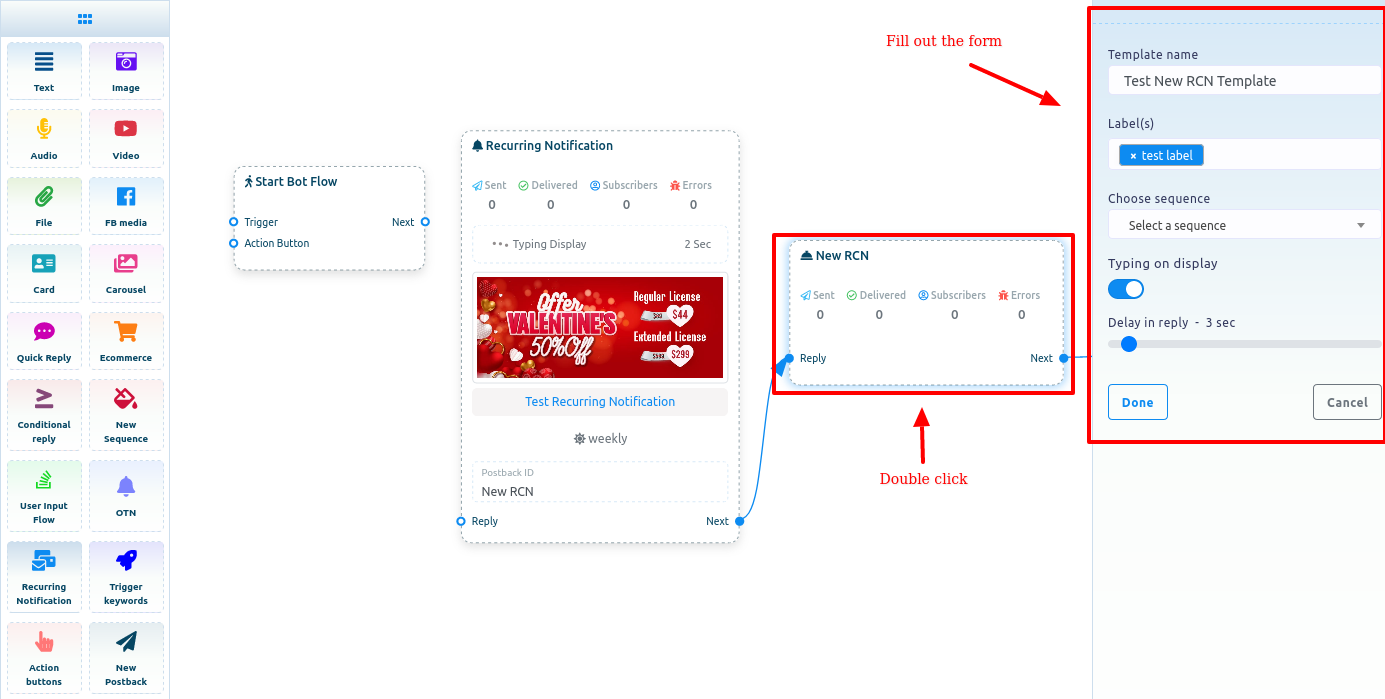
Now click on the Done button. Instantly the data will appear on the New RCN component.
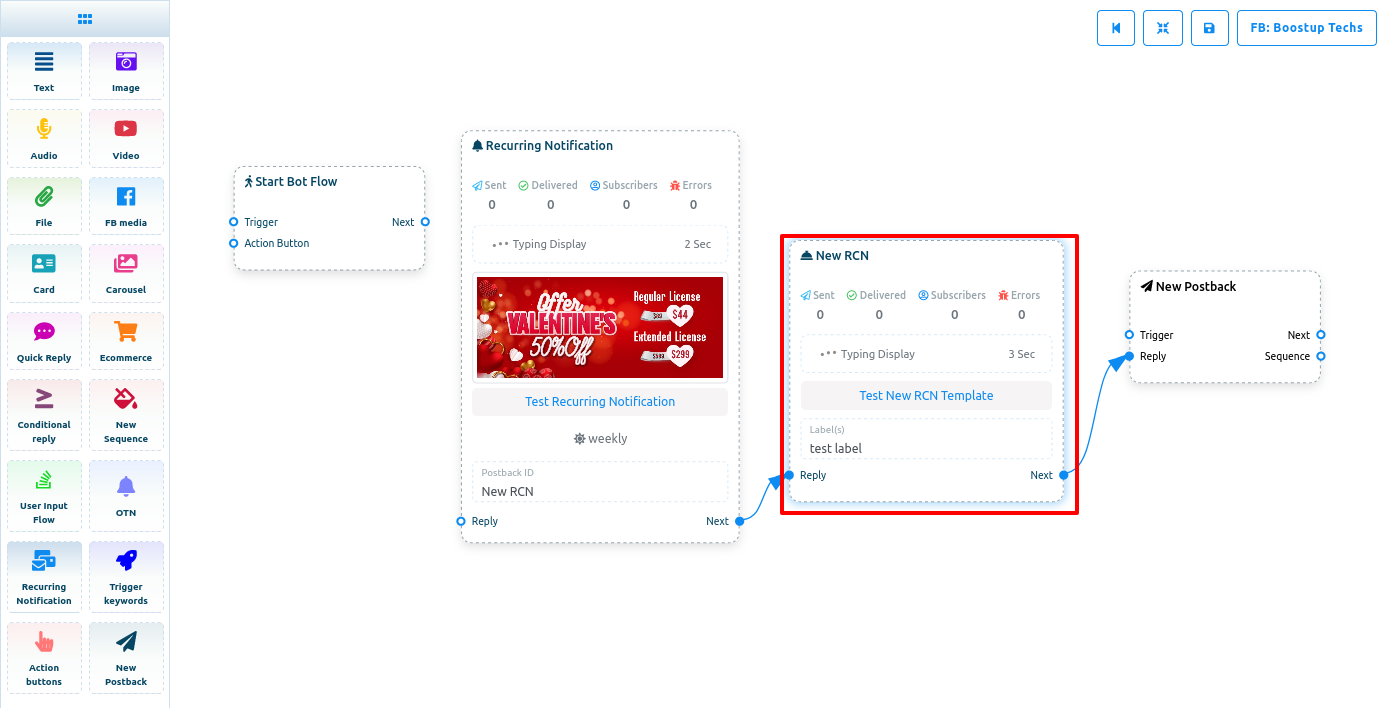
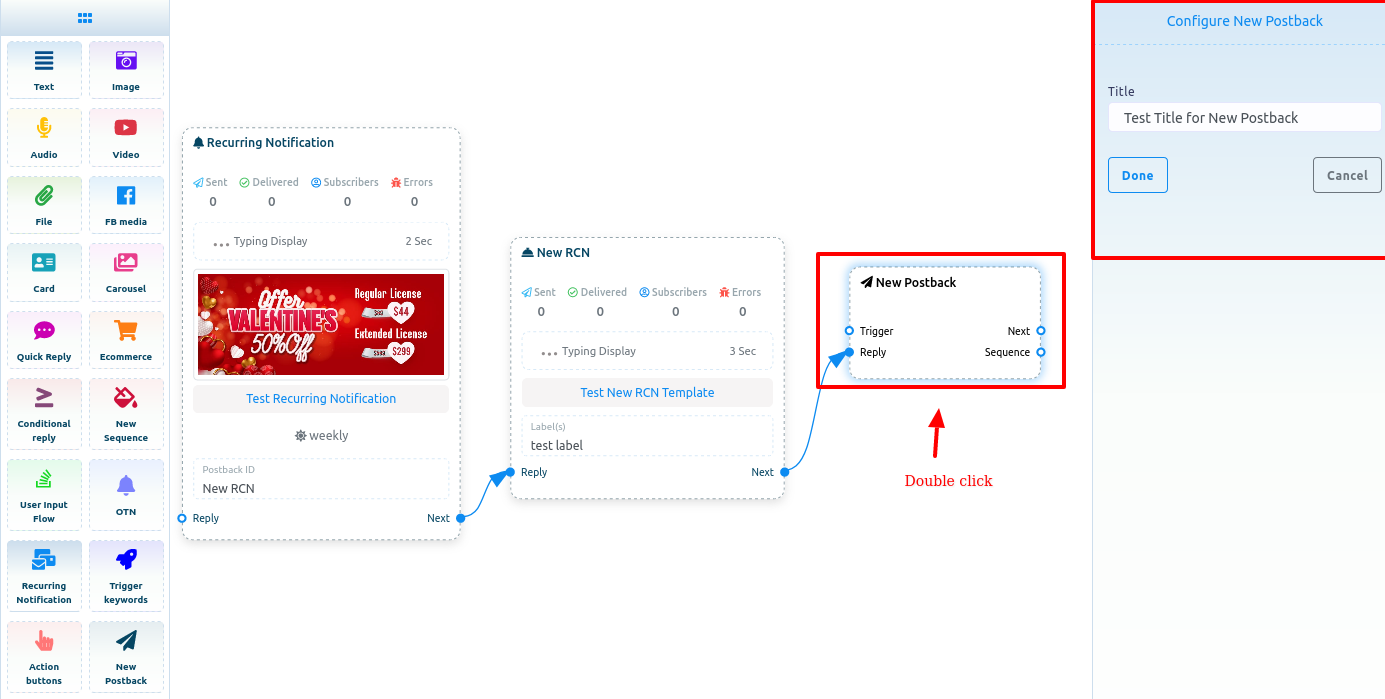
Now configure the New Postback component by giving it a title.
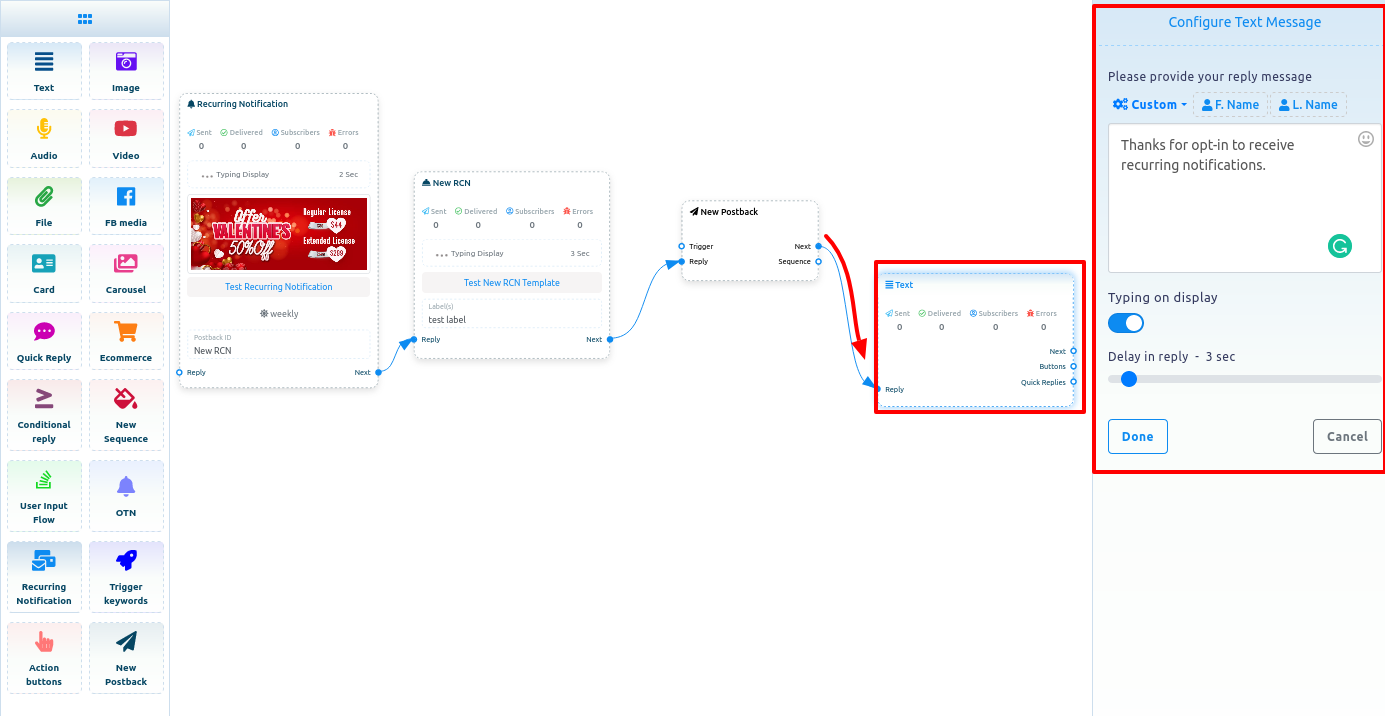
Now you can add any component to give the user a last message. Here I add a text message to thanks the user for opting-in to recieve Recurring Notifications.
Now you have to develop a bot with the components so that the bot can send request to user to opt-in to receive Recurring notifications.
To develop the components as a bot, you have to connect the Recurring Notification with the Start Bot Flow. Then you have to provide a title to the Start Bot Flow component.
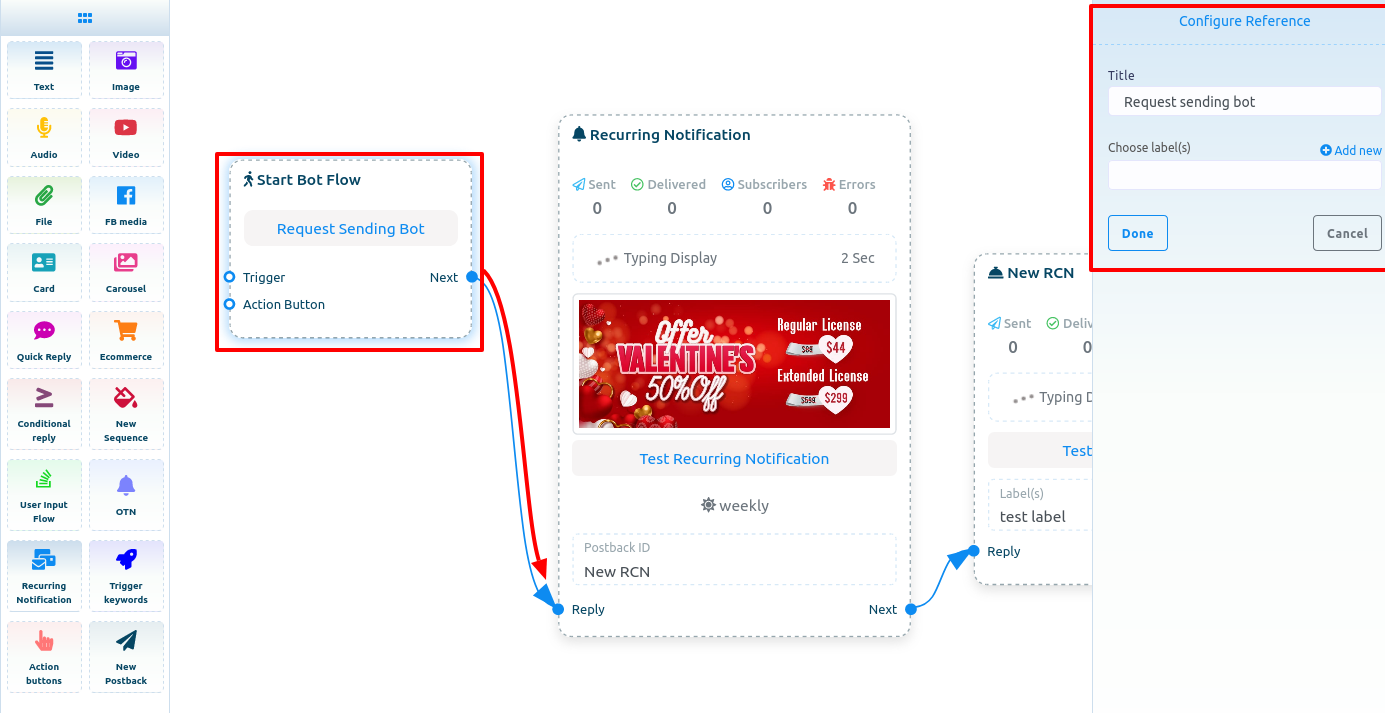
Then drag and drop trigger component and configur trigger components by providing Keywords to the Trigger component and connect theTrigger component with the Start Bot Flow Component.
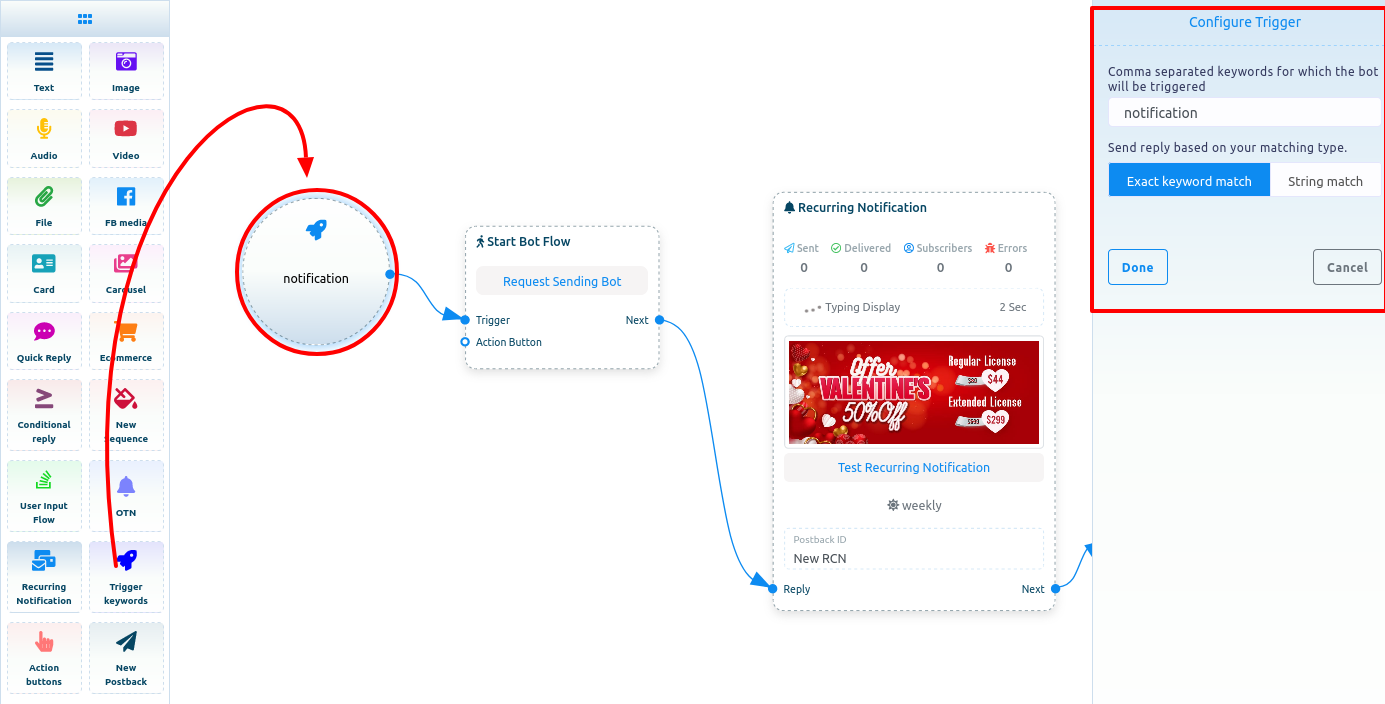
When a user triggers the bot, it will request the user to opt-in to to send recurring notifications either daily, weekly, and monthly.
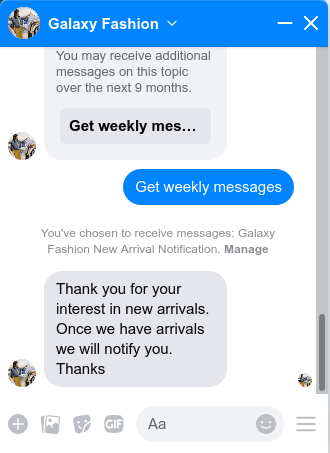
And if a user opt-in for Recurring Notification, he/she will receive Recurring Notifications.
Create a campaign on Recurring Notification Broadcast
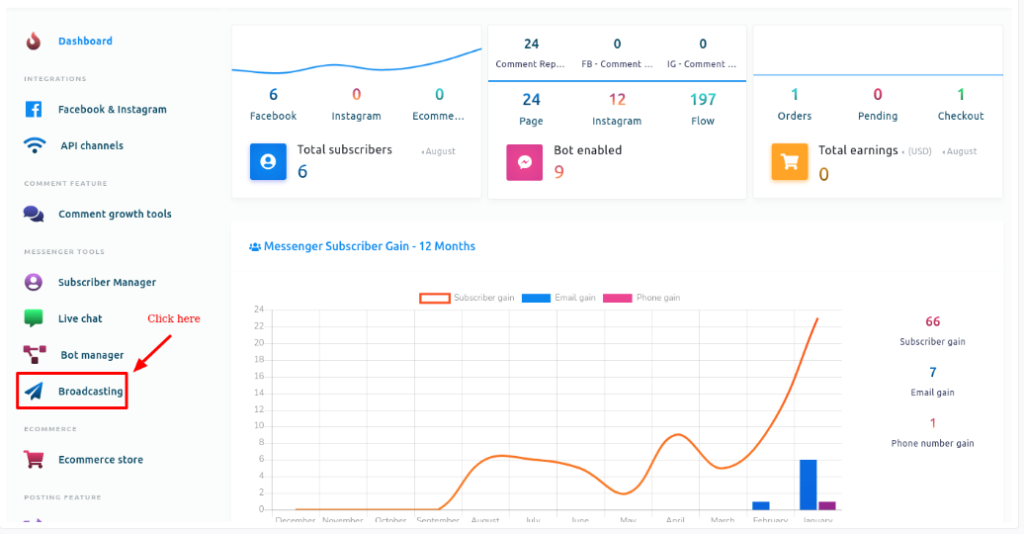
To create campaign on Recurring Notification Broadcast, click on the Broadcasting menu in the left side bar of the Loomsuite dashboard.
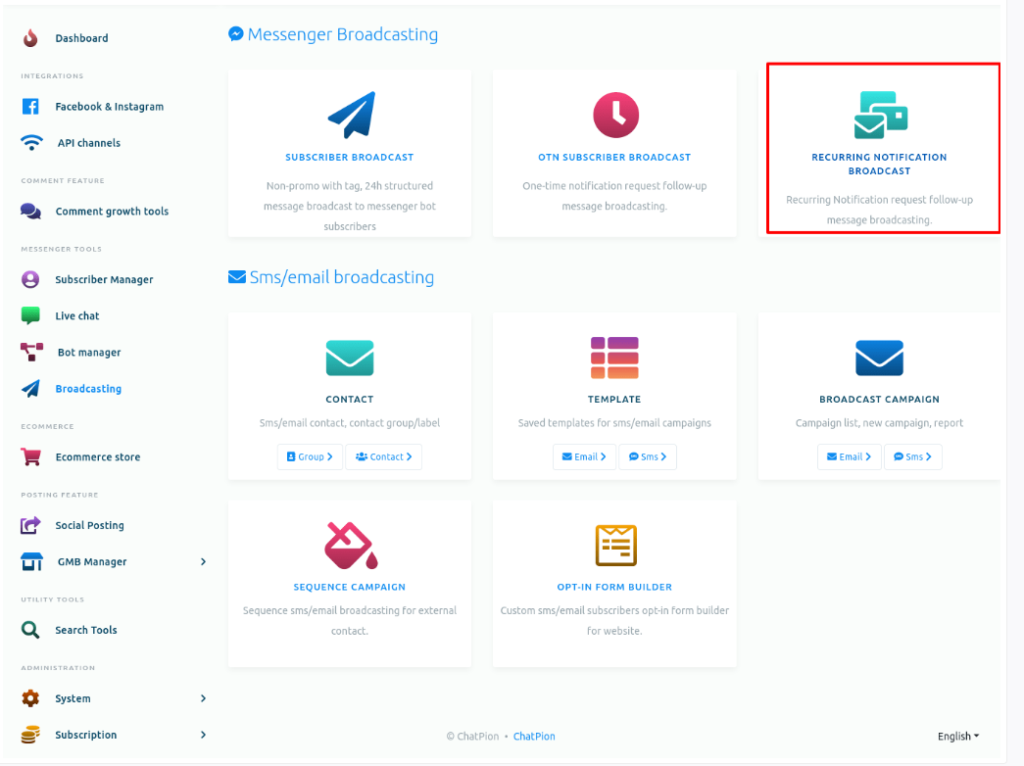
Instantly, a page will appear with two sections — Messenger Broadcasting and SMS/Email Broadcasting. In the Messenger Broadcasting section, you will sse an option called Recurring Notification Broadcast.
Now click on the Recurring Notification Broadcast option.
Instantly, a page called Recurring Subscriber Broadcast will appear with a button called Create Campaign.
Now click on the Recurring Notification Broadcast option.
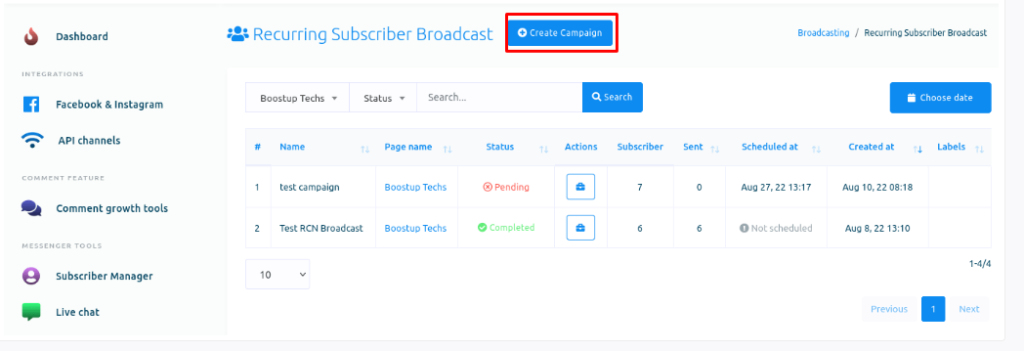
Now click on the Create Campaign button.
Instantly a form page divided into three sections — Campaign details, Targeting option and Message Template — will appear. And you have to fill out the form.
Campaign details
Give a campaign name in the campaign name field. In the select page field, select a Facebook page. After you have selected a Facebook page, a field called RCN postback template will appear. In the field, you have to select a pre-defined RCN postback. Click on the field and a drop-down list of pre-defined RCN postback IDs will appear. And from the list, you have to select a RCN postback ID.
Testing Option
Then come the targeting section. You can fill out this section if you want to target audience to send recurring notification.
You can target and exclude audience by labels. In the target by label field, select labels you want to send the Recurring Notification to the audience that are included in label. In the exclude by label field, select labels you don’t want to send the Recurring Notification to the audience that are included in label.
Moreover, you can target audience based on gender, time zone and locale. In the gender field, select a gender. Select a time zone in the time zone field. And select a locale in the locale field.
In the message template, you have to create a message for the notificacion. That is, this message will be sent as the notification. Here, you can create multimedia message— Text, Image, Audio, Video, File, Quick Reply, Text with Buttons, Generic Template, Carousel, and Media.
Since you are user of ChatPion, you know well how to create a template for message.
Sending time
Note that, since it is message template for Recurring Notification, your have to send the message according to the Recursion Type you have selected while configuring Notification in the Flow builder — building bot for sending request to opt-in for Recurring Notifications.
For example, If you select weekly as the Recursion type, you have to set Recurring notification broadcasting campaign to send recurring notification once a week. Otherwise, your Facebook page will be in trouble.

Now click on the Create campaign button. And the campaign will be created. And the campaign will be listed in the Recurring Subscriber Broadcast page.