How to set up Trigger keywords on your Instagram Account with flow builder
In this blog, I will show you how to set up trigger keywords for your Instagram account with Loomsuite Flow Builder. Please follow the instructional blog step by step to create the story reply properly .
Before you can set up keyword trigger, you must have connected your Instagram Account to your Facebook account and import them into Loomsuite.
Please follow this link to do that if you have link.
First, go to the dashboard of the Loomsuite. Now click on the Bot manager option at the left sidebar of the dashboard.
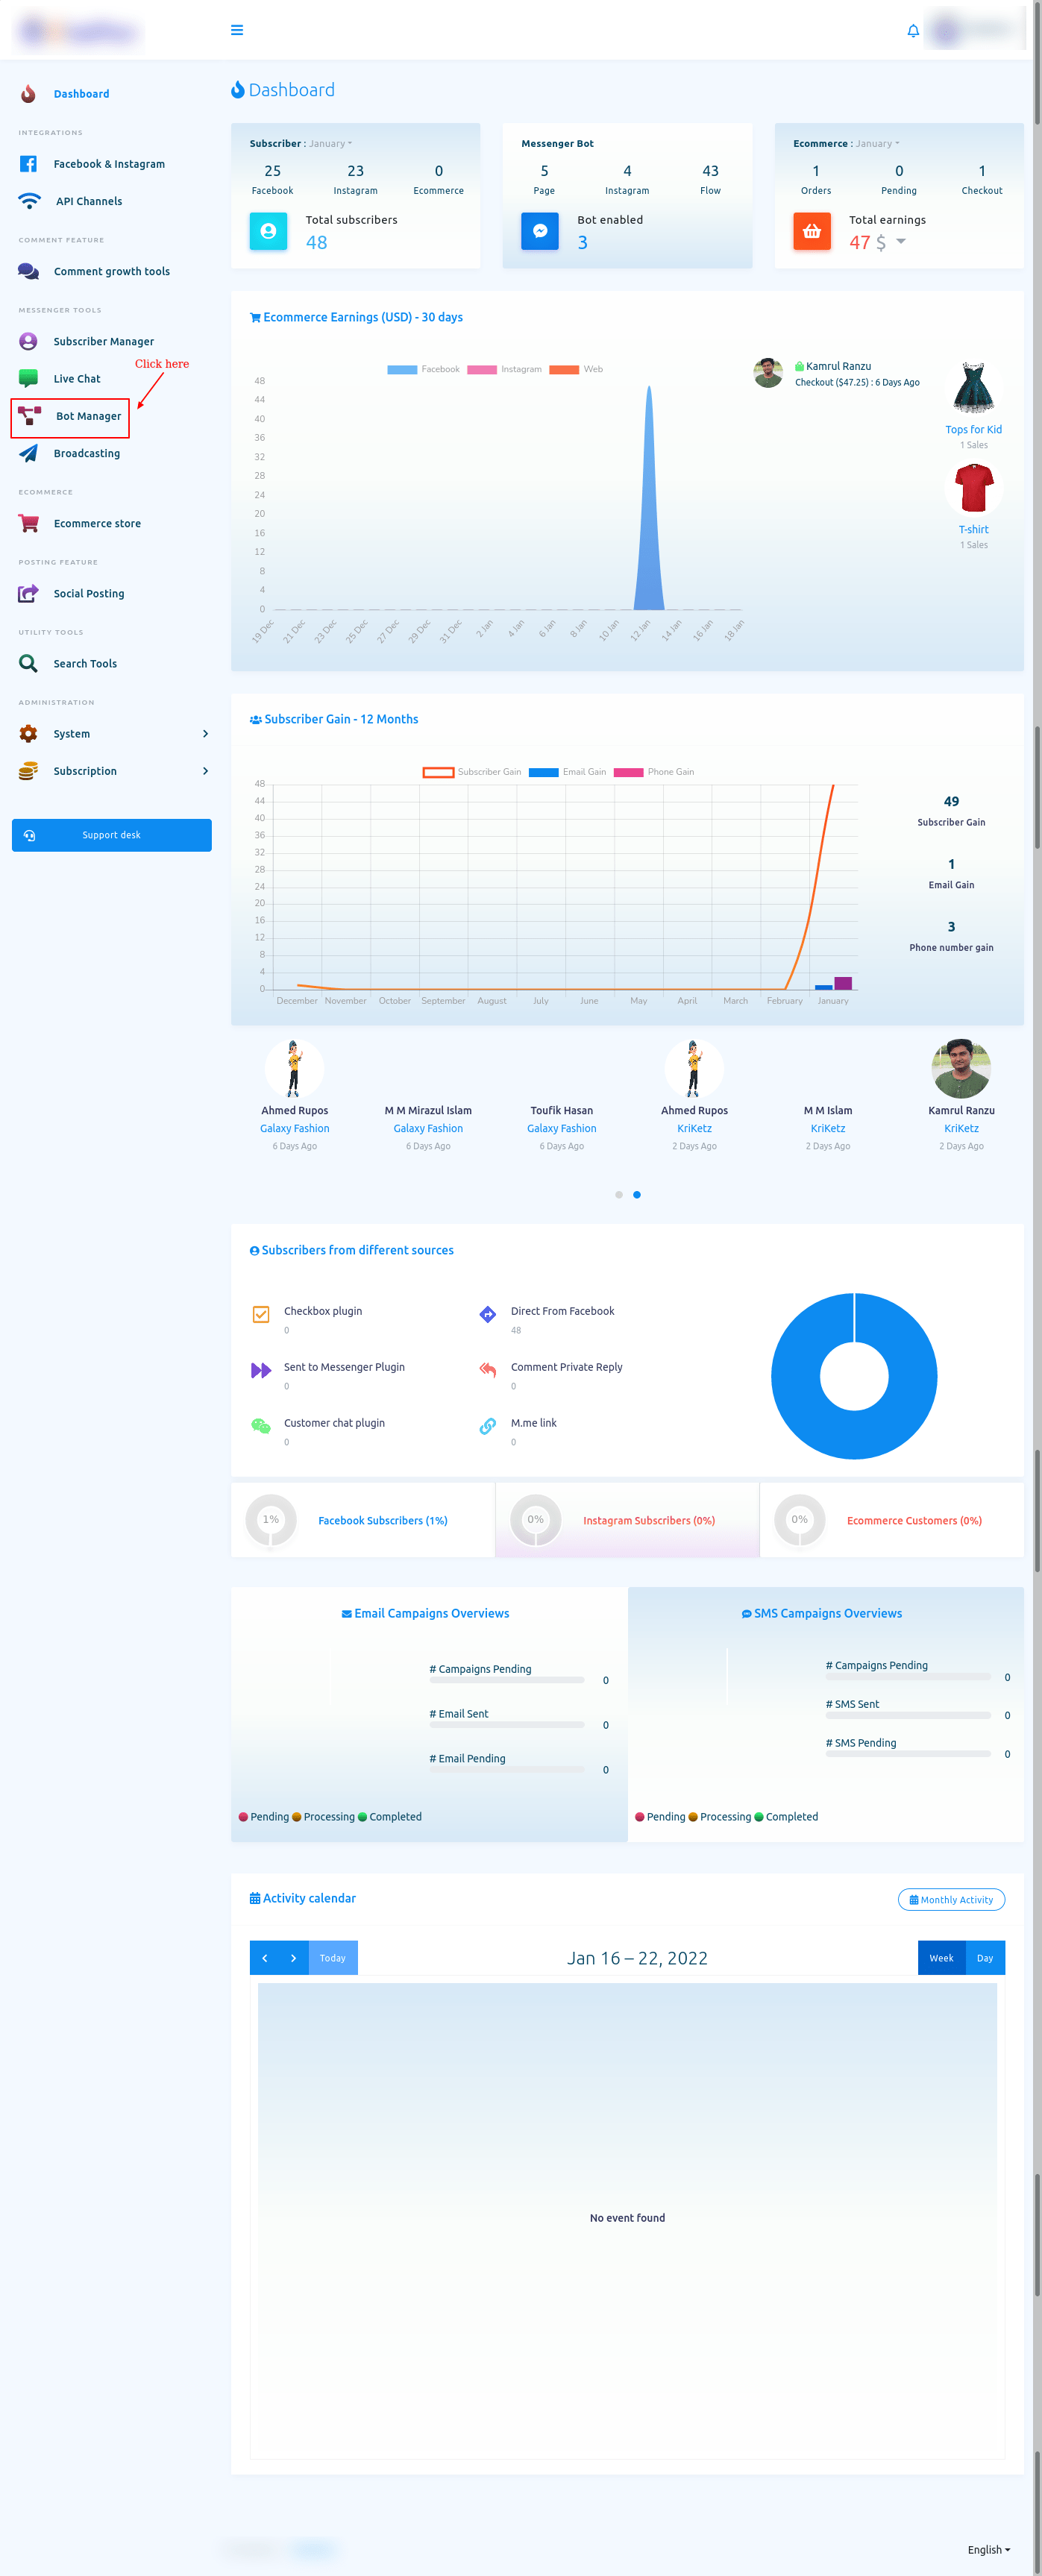
Bot Manager
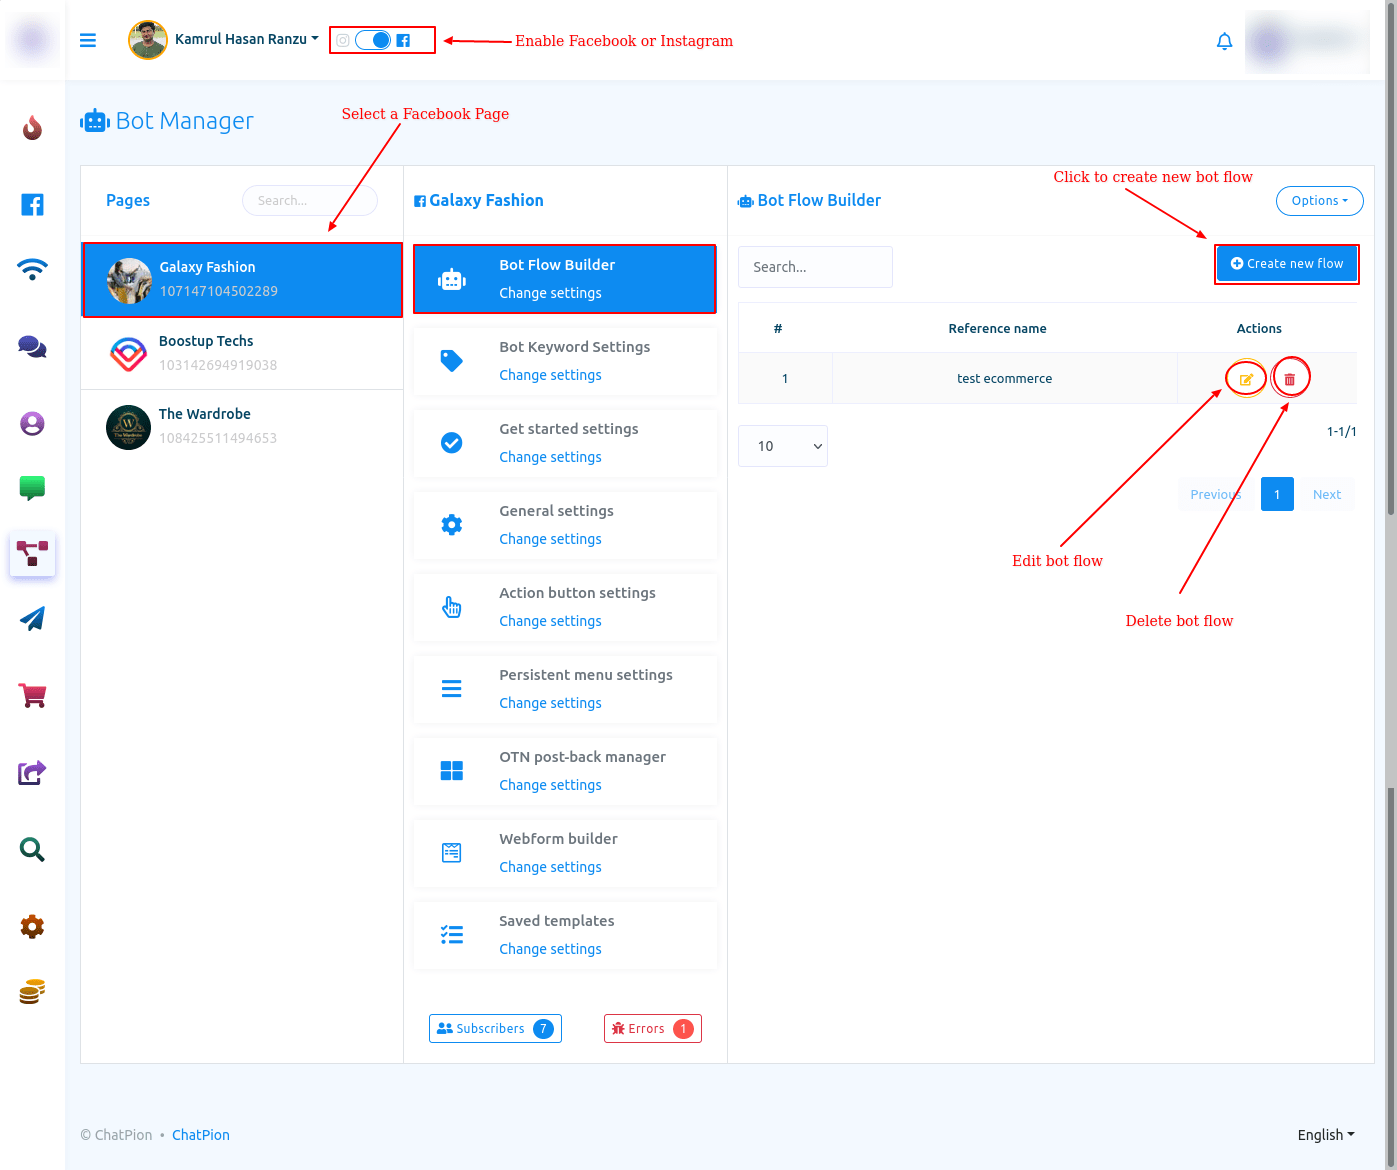
The Bot Manager page will appear. At the top of the page, you will see the profile of your Facebook account that you have previously connected to your Instagram account. If you have imported more than one Facebook profile, you can change the Facebook profile at the top right hand corner by clicking on your user name. From the drop down, you select your preferred Facebook account you want to use.
- Select which platform you want to perform the keyword trigger. Facebook or Instagram.
- Select the page or Instagram account you want to use.
- Click on the create new flow at the top right hand side.
Visual Flow Builder Editor
The editor of the Flow Builder will appear. The editor is divided into two parts – Doc-menu and editor. On the Doc-menu, all the components are gathered together. To build a bot, you have to drag components from the Doc-menu and drop them on the editor. Then you have to configure the components and connect them to each other.
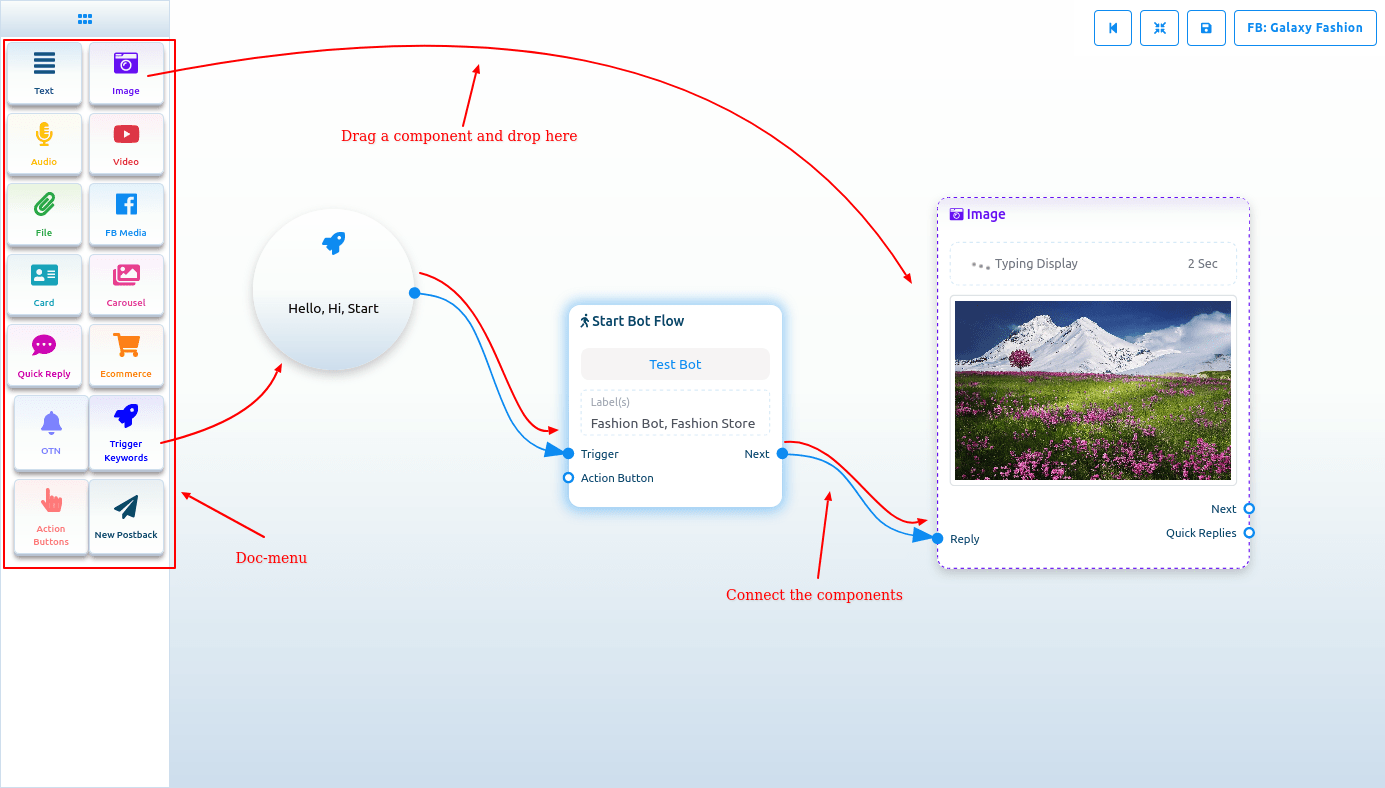
Start bot flow
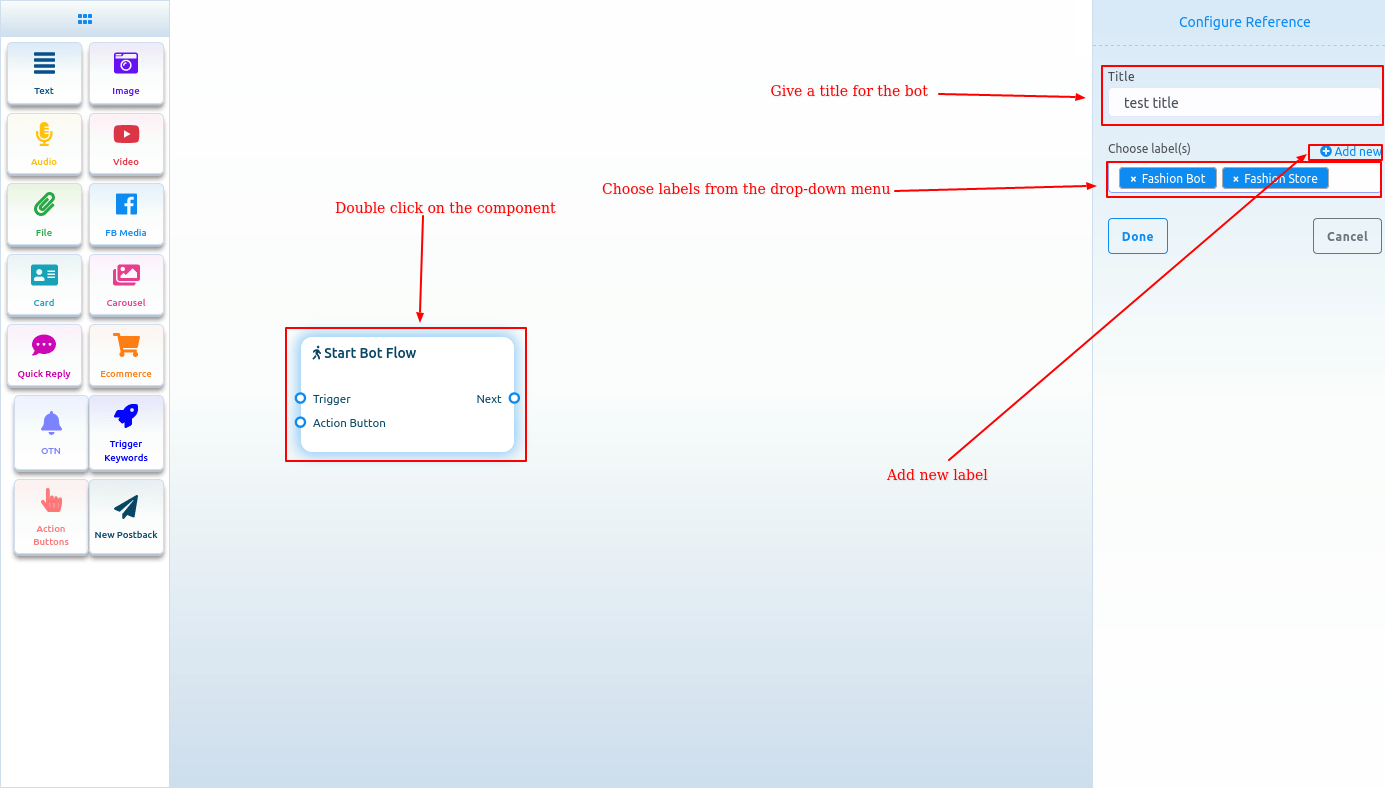
On the Editor, you will see an element called start bot flow. This component is essential to building the bot. Double-click on the Start bot Flow element and the Right Sidebar called Configure Reference will appear with two fields – Title and Choose Labels. In the title field, give a title for the bot.
And in the Choose labels field, you have to select labels from a drop-down menu of different fields. You can select multiple labels in the Choose labels field. Now click on the Done button and the information will be added to the element.
You can also add a new label
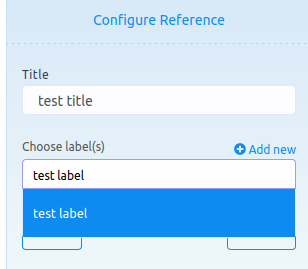
Add new label
And from the Choose labels field, you can add a new label. Just write down the name of the label and press enter.
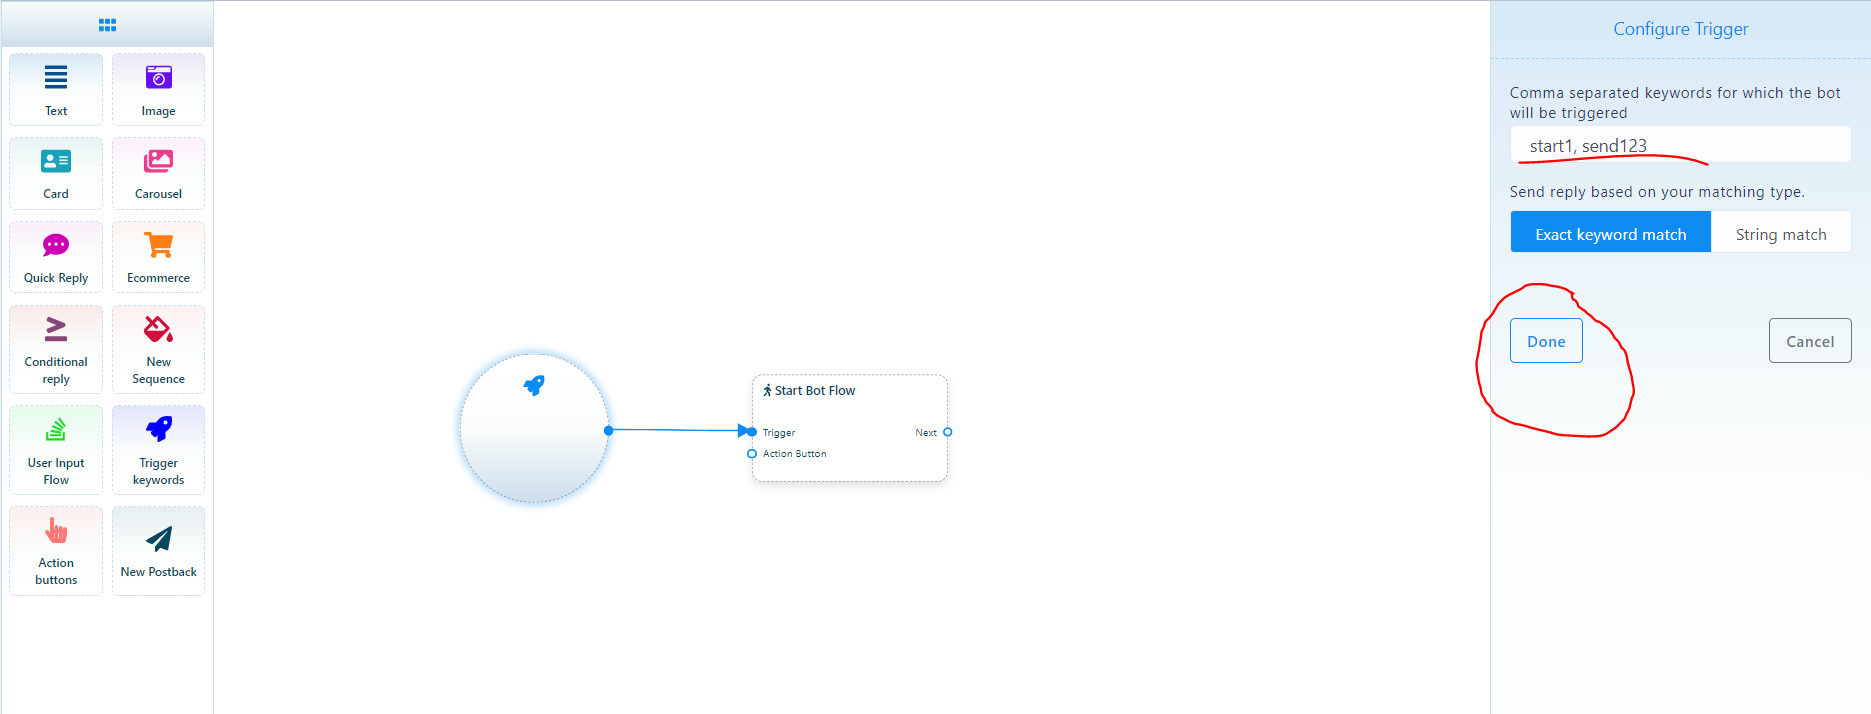
Trigger keywords
Now drag the trigger keywords element and drop it on the editor. Now double-click on the component and a sidebar called configure Trigger will appear. In the field, you have to provide comma-separated keywords. When a user writes one of the keywords, the bot will start. Also, you can select a matching type – Exact keyword match and String match. Then click on the Done button. And the keywords will appear on the component.
Now connect the Trigger Keywords component with the Start Bot Flow component.
NOTE- use keywords like sales1, autosales and the likes so as to avoid the trigger of the bot if you use keywords that can be typed and send by your followers.
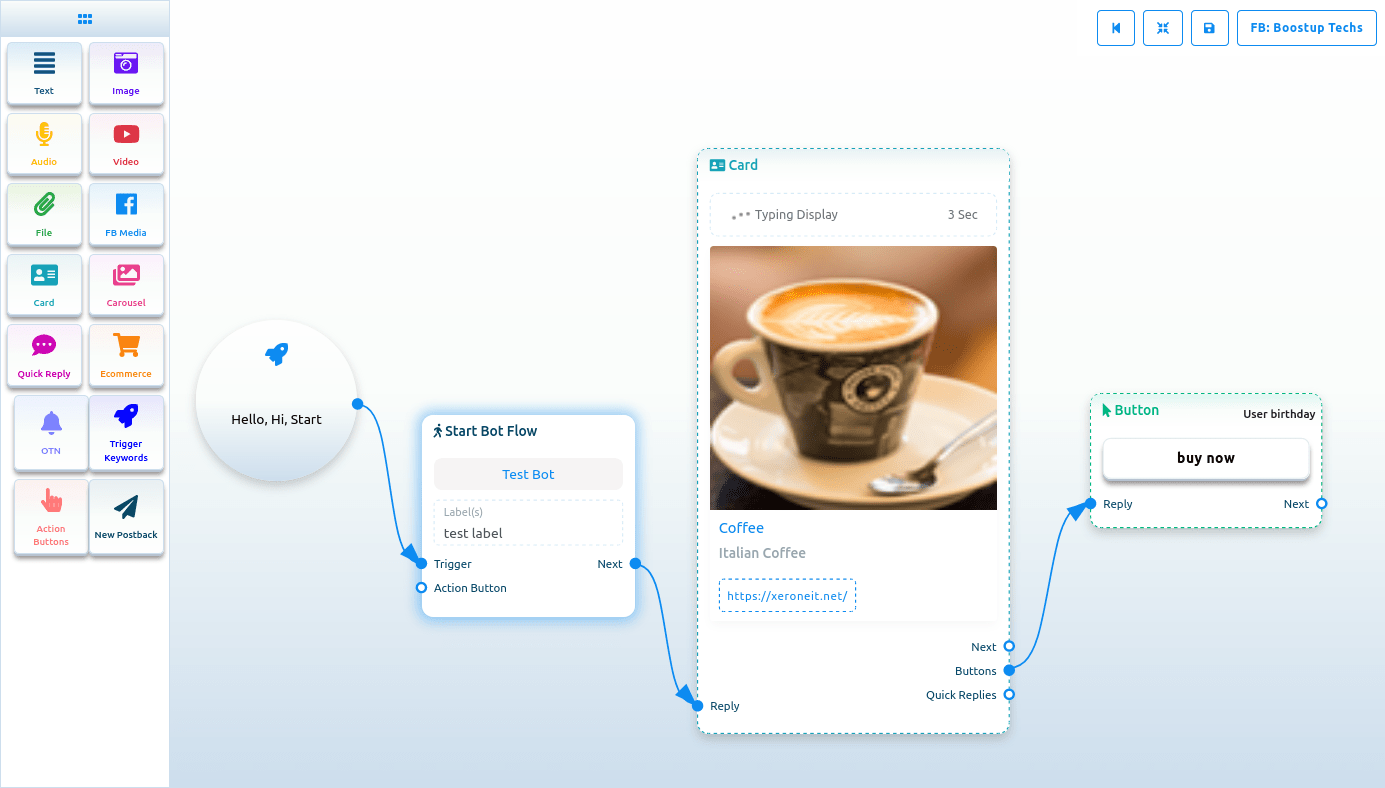
Add components without dragging from Doc-menu
You can also add components without dragging the component from the Doc-menu and dropping it on the editor. From the next output of any component, drag the cursor and drop. And instantly a menu of the different components will appear. And from the menu, select a component and the component will appear on the editor connected with the mother component.

If you drag your cursor from the button output of any component and drop it on the editor, then the button component will appear on the editor connected with the mother component.
NB. The Button component is not present in the Doc-menu.
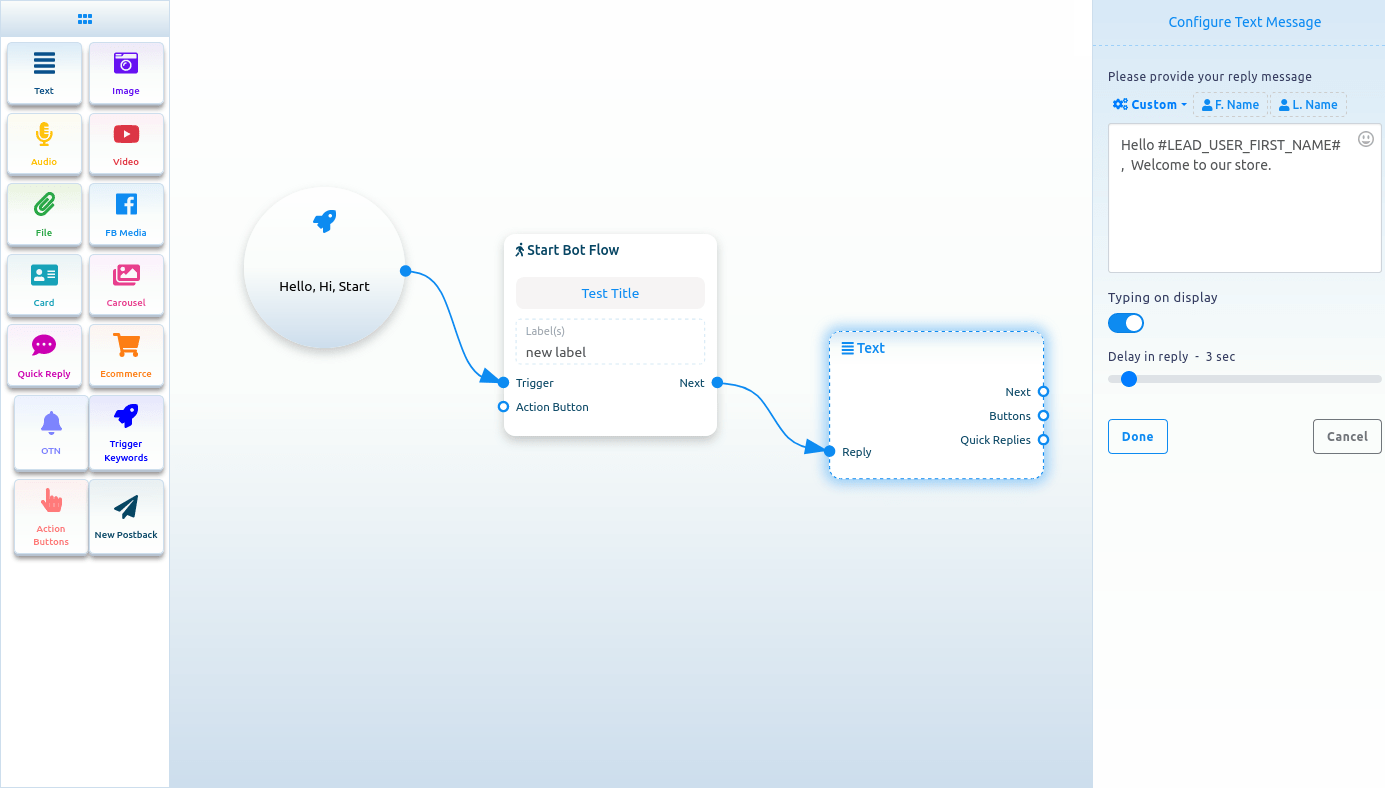
Text
If you want to build a bot with a text element, drag the Text Component and drop it on the editor. Now double-click on the component and a sidebar called Configure Text Message will appear with a text field. In the text field, you have to provide your reply message. You can include the first name or the last name of the user in the reply message.
You can also enable typing on display by turning on the radio button. Then you can select the delay time in reply in seconds.
Now click on the Done button and the information will appear on the component. Then connect the text component with the Start bot flow component.
After adding test to the test component, you can also add more component and the save button at the top right hand side when you finish.
You can learn more on how to use the flow builder to create dynamic flow from this link